Kevin Hayler: Professional Wildlife artist, author, and traveler.
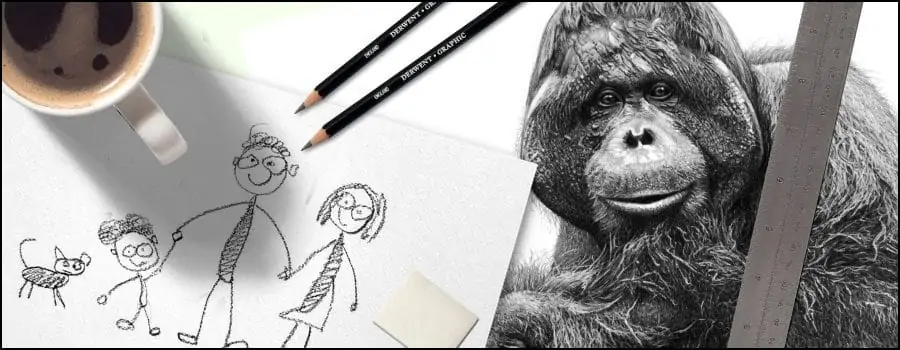
Those who can – do, and those who can’t – teach, a little unfair perhaps but there’s an element of truth to it. So how do you get better at drawing if the teacher isn’t very good?
Get better at drawing by learning how to hold a pencil correctly, drawing simplified shapes first, measuring proportions, drawing from light to dark, drawing with an eraser, and experimenting with different types of lines. Above all practice regularly. Little and often
Read through the following 16 drawing tips. This is my advice from personal experience and these are some of the best ways to get better at drawing and see big improvements in your skill level.
Let’s begin.
Disclaimer: When you buy something via my affiliate links I earn from qualifying purchases and sometimes earn a commission, at no extra cost to you. I am an Amazon Associate among others. I only recommend trusted sites.
Getting Better at Drawing
I’m an experienced artist and I’ve been drawing all my adult life, that’s a long time, I’m 61 now. These are some practical drawing tips that will show you how to get better at drawing and improve your art skills.
There’s no substitute for practice, we can all agree on that, and we learn best from our mistakes. I often think that a drawing is just a series of corrected mistakes. The trick is to build on small successes and to take things slowly.
‘Success is the ability to go from one failure to another with no loss of enthusiasm’
Winston Churchill
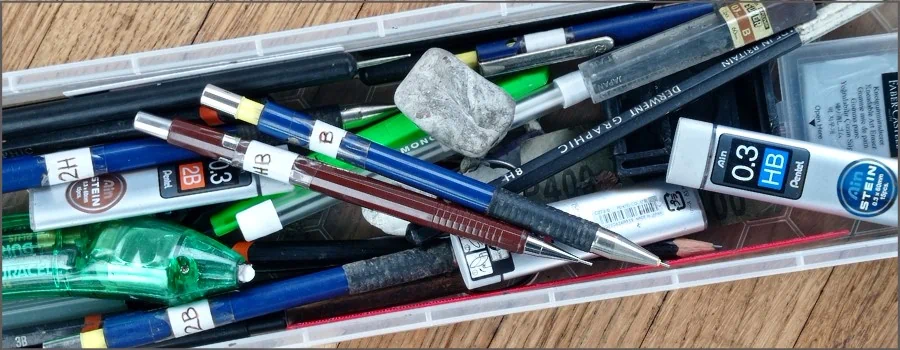
1. Use One Brand of Drawing Pencil
This is important so listen up, this is the first thing that beginners get wrong. Choose a quality pencil brand and get used to them. It’s important because each brand has its own quirks. They are not all the same. The biggest difference between them is the grading system.
If you want to know more:
- What Do Pencil Numbers Mean? Pencil Grades Explained + Charts
- Best Drawing Pencils for Beginners: How to Choose (2023)
- Best Mechanical Drawing Pencils For Artists in 2023
- What is the Best Type of Pencil to Use With Watercolor?
- Can You Draw With Mechanical Pencils? YES! Here’s How
You’d think that if a pencil is only made of graphite with a clay binder, there would be a universal grading system wouldn’t you? Not a chance, that would make life too easy.
An HB pencil in one brand is not an HB in another. That means when a beginner artist wants to know what pencil a professional artist is using, they have to know the brand. Otherwise, it’s misleading and a student will not be able to acheive the same results.

You are going to have to bow to experience on this one because I know that this one piece of advice alone will help you to improve your drawings.
Choose a well-known brand and stick with it. Don’t mix and match until you know what you are doing.
Personally, I use Derwent Graphic Pencils, Why? because they were easily available when I started, so I stayed with them.
Staedtler Mars Lumograph pencils are readily available worldwide in my experience. If you want to draw blacks without the shine choose their Lumograph black range.
Choose a brand that sells its pencils individually. I’m not interested in buying a pencil set just to replace one pencil. That’s crazy.
These are Amazon links if you want to check them out:
You’ll probably choose to buy your pencils online but I prefer visiting my local art stores, it’s a simple pleasure and sadly, one that is fast disappearing.
2. Buy Less Art Equipment
I’ve just said I love browsing in art stores, and now I’m going to suggest that you don’t buy too much “stuff” and here’s why.
One of the great giveaway signs that an artist is not confident is the amount of art equipment they carry.
Beginner artists always have too much kit.
You don’t need 20 grades of pencils. You’ll only use 3 or 4 of them. If you sketch outdoors, you’ll need a small drawing pad, a sharpener, and a Kneadable Eraser
You can have more stuff at home but most things you buy are not magic bullets. There is only one wonder gadget I like to use and that’s a Jakar Battery Eraser.
They are very cheap and brilliant for lifting fine highlights. I’d go as far as to say when I first used this tool it was a game-changer for me.

You don’t need an easel really. I use one now because I draw in front of people, but I didn’t use one before that. It’s an optional extra.
Rely on fewer tools and it’ll make you a better artist.
3. Hold Your Pencil Correctly
Amateur artists tend to hold their pencils the wrong way. If an easel has any value, it’s training art students to step back and use their pencil lightly.
When an artist maps in the rough lines and basic shapes of their drawing it helps if they have a loose hand. Holding the pencil at the rear, with an underhand grip, trains you to draw with a quick and fluid line.
Discover your bad habits: 32 Drawing Mistakes and Bad Habits Artists Must Avoid
It’s only when you want to draw very tight detail that you need to pinch the pencil as if you were writing.
Try using different sizes of paper. The larger paper will free your arm to draw with bigger strokes. Small pads will force you to draw tightly.
This might interest you: What Size Art Sells Best? Frames and Apertures – FREE Chart
Detail is drawn using short strokes, and applied using wrist movements. Broader shapes are drawn with long strokes, from the elbow.
Don’t make the mistake of touching the paper as you shade. That’s how you smudge your work.
These are fundamental skills and are easily overlooked. You will see your drawings improve so don’t ignore them.
4. Draw Simple Shapes First
Think of drawing as a series of layers. Each layer adds detail to the last and gradually a simple shape evolves until you have an accurate drawing.
When you map in the proportions of a drawing, simplify the largest shapes and rough them in first.
DO NOT draw detail or complex shapes at the planning stage. If you do, it will go wrong.
Draw block shapes within shapes. Refine, adjust, and align those shapes in relation to each other. This is the drawing process in a nutshell. If you can grasp this concept your drawings will get much better.
There is room for error everywhere except for the focal point. You must get that right.
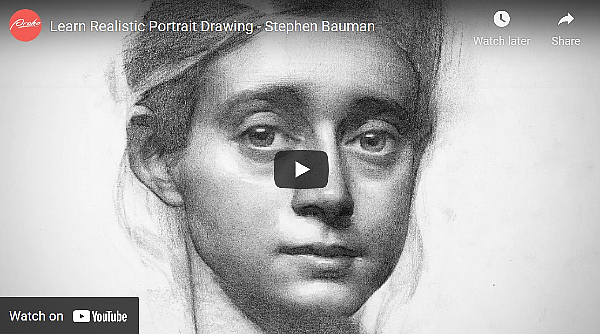
Stephen Bauman explains things better than I can. He has a new course on Proko.
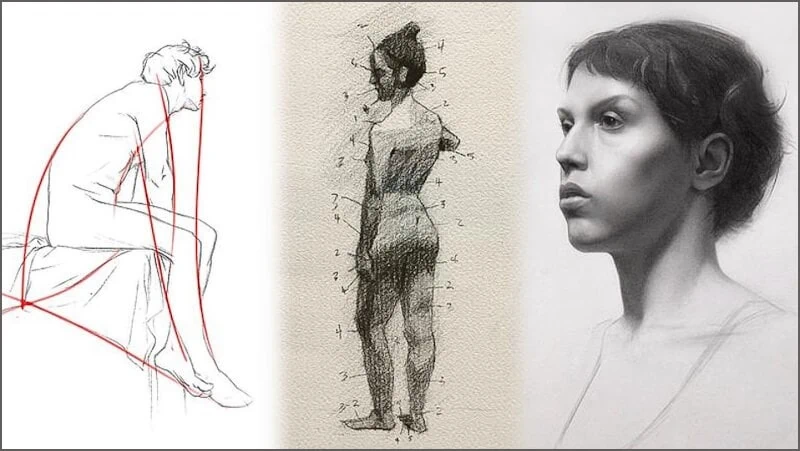
5. Drawing Proportions
If you are still at that stage of wondering why an artist holds a pencil upright with their arm extended, it’s to get the proportions right.
This post is useful: How to Plan and Compose Your Art: A Guide for Beginners
It’s easy to imagine a row of buildings. The artist holds up the pencil, as a measuring stick, and gauges the height of a building using the length of the pencil, from the nib down to the thumb.
The artist shifts their extended arm sideways to compare the height of the neighboring building. The pencil is in effect a measuring stick.
The same process is repeated everywhere as needed, both the vertical and horizontal lines.
Listen to Stephen Bauman, this tutorial is a freebie on Youtube.
6. Learn The Rules of Perspective
You always see buildings used to explain perspective. They use receding lines and vanishing points. That’s great in theory.
Perspective drawings are created by imagining straight lines radiating from a vanishing point, it sounds very simple and it is, as a theory. Every tutorial mentions 1, 2, and 3-point perspective as if mastering these rules will solve all your problems.

The real world is not so obliging. I can honestly say I have never drawn anything consciously using these rules.
I draw only what I see. I’m not drawing perspective, I’m drawing shapes. The perspective is the result of looking at the shapes properly. Both the positive and negative space.
In my book, if a line looks wonky, it’s because the line is wrong. The solution is to sketch several more lines and choose the one that looks right. I don’t look for vanishing points.
Rules of perspective only work clearly with blocks or simple objects. Try it with a glass jar and see how you get on, you’ll get totally confused. If you concentrate on shapes, instead of perspective, it’s a lot easier to see what you’re drawing.
Draw vertically. If you don’t have an easel, raise your drawing board higher. There’s a good reason, let me explain.
I wrote this post about easels: Best Easel For Drawing and Painting: How to Choose
This is an area where almost everyone gets it wrong at the beginning. If you lay your drawing pad flat on the table you are in danger of distorting the proportions as you draw. Looking down from 90 degrees to your drawing foreshortens the image.
I wrote about drawing at an angle here: What’s the Best Angle For Drawing and Sketching?
It’s only when you raise your pad vertically to check your progress, that you realize the whole drawing is elongated. It’s a rooky mistake.
7. Draw From Light to Dark
Build your drawing lightly and in stages. It can be a big mistake to block in dark areas too soon. It’s easy to draw from light shades to dark ones, but it’s difficult if you work in the opposite direction.
Give yourself some wriggle room and sketch with a light touch. Start by drawing lightly and gradually increase the pressure. The lighter tones should be put down first, gradually making them darker. Work your way up from lighter shadows.
I like to map in a basic line drawing, making sure the focal point is drawn accurately. Then I block in the shaded areas with light hatching. Nothing that cannot be erased later.
Knowing where the light and dark values lie helps me to see the drawing as a whole. It gives me some clues as to the balance of the composition. I can readjust everything in the early stages before I’ve drawn something I’m reluctant to lose.
Dark values look better if they have been shaded in several layers. It’s tempting to use a soft pencil and block in the darks in one go. There’s a good argument for doing that with pastel, but not so convincingly with graphite.
It’s almost impossible to regain the whiteness of the paper if you use soft graphite. The stain is permanent and the graphite shine can ruin all your hard work.
You have far more control if you darken your drawing as you go. I draw my darkest areas in several layers of neat cross-hatching, using a 0.3mm Pentel Mechanical Pencil most of the time, and I go no darker than a 2B.

The Pentel P200 Range of Mechanical Pencils
The leads are so thin I have to have a light touch or they’ll break. I hatch in one direction across the drawing and cross hatch in the opposite direction until I reach the tone I’m after.
If I need to go back and erase any of the black tones, it’s far easier to remove several layers of lighter shades than it is to remove one heavy layer.
The paper returns almost as new if you erase small areas with a battery eraser. It’s a great tool.
8. Don’t Be a Slave to Copying Photos
Use photos by all means but being dependent on them will stunt your learning process. I use photos all the time, but I know how to manipulate and edit them. They are an aid, not a prop.

Taking photographs can give you a false sense of your own drawing abilities and it gets you into bad habits. Try sketching from life and use your photos as a reference for making the finishing touches.
Easier said than done I know. This is more about developing good habits and drawing practice as you learn your craft. It’s not always possible to sketch from life, not when you draw wildlife as I do.
Find out more about using photos: Is Drawing From Reference Photos Bad? Are You Cheating?
I use photos with a pick-and-mix approach. I take what info I need and discard the rest. If you use photos, take your own. This is an important tip. Don’t use other people’s images and think the drawing will be your own because you’ll be disappointed.
Part of the creative process is developing your own unique eye for composition. If you use other people’s photos you are piggybacking off their skills and not learning much.
This post is important: Can You Copy Art and Sell a Painting of a Painting? I Found Out
9. Learn to Draw From Memory
I’m not a great advocate of drawing from imagination. It implies that you have an intuitive knowledge that can be expressed in doodles and scribbles.
Learning to see, copying, and studying should embed the drawing in your mind’s eye. Certain themes, forms, and shapes will recur over and over again. There will come a time when you can draw certain things from memory alone. It’ll come naturally.
It’s a good idea to try and memorize as much as possible. Not only basic knowledge such as learning how shadows lie, and reflections behave, but drawing techniques too.
It is much easier to draw when your muscle memory takes over and you know in advance what technique to use for the effect you’re after.
When you don’t have to think about things too much, drawing is more fun.
Drawing from memory comes in useful if you ever have to improvise and draw something without any references to hand. It will also speed up your sketching skills because the drawing process will become more intuitive.
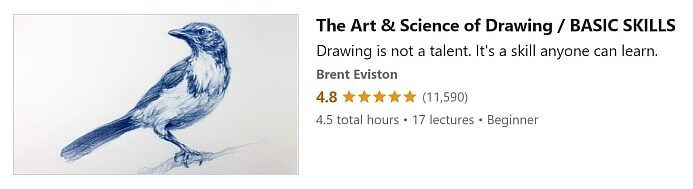
10. Learn How to Shade Properly
Many beginners have trouble making their shading look convincing. The main reason for this is the random nature of their hatching technique.
There are some simple tips worth remembering.
Parallel hatching lines look neat and tidy. I tend to draw diagonals from left to right and carry that style over the whole drawing. It gives the drawing some coherence.
If I want to darken an area I can cross-hatch the other way, in a reverse diagonal, from right to left.
If the shading lines are neither parallel nor directional the marks join badly. The blotches look patchy, uncoordinated, and dirty. It can work if you deliberately want that effect, otherwise, it’s a dog’s dinner.
Some people stipple with small dots, I don’t see why you would want to, not with graphite pencil. I create a stipple effect by lightly shading with the side of a pencil over textured paper.
Graphite can be blended with paper stumps, cotton buds, and soft blending brushes. It looks great for subtle gradations of tone. It’s particularly useful for skin tones and can be removed entirely if you go wrong.
This post will show you: How to Draw Realistic Shadows
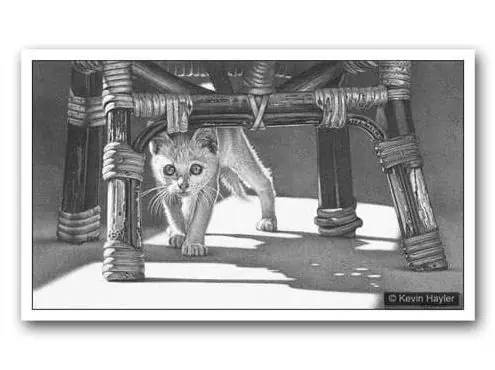
If you like realism, shading hair, and fur can look more authentic if you draw in the direction of the growth. In this case, the hair should crisscross slightly to look authentic. Highlights can be lifted off with an eraser.
This very popular drawing course by Brent Eviston is on Udemy.
He has over 73,000 students!
11. Avoid Smudging Your Drawings
Most smudging is a result of poor practice and laziness.
Try to avoid resting your hand on the paper if you can. Plenty of tutorials suggest laying a sheet of paper under your hand, but not all of them tell you that the paper must not move either. You must use your free hand to keep the paper firmly in place as you draw with the other.
This will help: Prevent Your Drawings From Smudging: The Ultimate Guide
If you draw at an easel holding the far end of the pencil will keep you from smudging the work. If you need more control use a Mahl stick (wooden rod) or a long ruler and rest your drawing hand away from the paper.
I also use acetate and cellophane to protect the paper surface instead of a piece of paper. I like to see the drawing beneath.
12. Use the ‘Lost and Found’ Drawing Technique
Let’s use the example of a building. If you draw a building with a ruler and draw perfect lines, you will produce a stiff, lifeless, and soulless drawing. Accurate but boring.
The same building drawn freehand will be better but still lacking in something. All the lines are in place but still, it’s dull.
Now break a few lines up. Instead of one continuous roofline, try drawing two lines with a small line break in between, or try drawing two lines overlapping at slightly different angles. Now your drawing has movement and personality.
Use that device with your contour lines. Break up and lose some edges. This simple tip will improve your drawing and take your art to the next level.

I’ve been using this technique for years and I always thought it was a contrivance and masked my lack of any real spontaneity. That was until recently.
I discovered that John Singer Sargeant, one of my favorite artists, and one of the greatest painters that ever lived, did exactly the same thing.
He labored over his brush marks to get them looking just right. I had always assumed that each and every stroke was impromptu genius. He had the same problems as the rest of us, except his results were better.
13. Sketch From Life
If you want a better drawing and to improve your skills, learn from life. It trains your hand and eye to capture the basic forms, texture, and depth of field.
It distills the scene in front of you down to the most important elements. Your brain naturally filters the key shapes and areas of interest. Photos give you too much information and it can be impossible to simplify complex subjects.
The better way is to sit in front of something in real life and learn to see it. Drawing is all about studying and really concentrating on the subject matter.
Sketching this way is a great exercise. It will force you to abbreviate detail and develop shortcuts for dramatic effect.
Drawing from life focuses your mind on what is most important. It’s a great way to improve your skills.
If you’re very inexperienced don’t draw anything too complicated, not to begin with, your failures will demotivate you. Don’t attempt portrait drawing or figure drawing if you can’t draw very well. It’s too advanced.
Other articles go on about gesture drawing and anatomy and all that stuff without mentioning that many professional artists can’t draw people well.
The important thing is to advance in small steps. The fastest way to learn is to bounce off small wins. Set the bar low and master one thing at a time.
The important thing is to advance in small steps. The fastest way to learn is to bounce off small wins. Set the bar low and master one thing at a time.
Yes, it’s OK to step out of your comfort zone occasionally and try new techniques but not to the extent that you are defeated and lose interest.
In the end, it’s all about practice. Join Sorie on Domestika and join over 100,000 students taking her sketching classes.

14. Draw With Your Eraser: It’s a Tool
An eraser is a drawing tool, it’s not just for correcting mistakes. Use an eraser to highlight individual parts of your drawing and to readjust tonal values by partially lifting away some areas.
Kneadable Erasers are flexible, so they’re perfect for most jobs, and great for broad erasing, especially if you are not drawing super detail.
Other types of erasers create different effects.
Need help with establishing your unique brand? This is for you: How to Find Your Own Art Style.
I use my battery eraser to lift off the tiniest dots and lines imaginable. I could never draw the brilliant highlight in an eye with any other tool. I’d have to draw around it.
It allows me to draw individual hairs and whiskers with no risk to the paper surface at all.
A standard Tombo Mono Eraser Pen lets me draw lines that are sharp but not quite as white. They are great for creating texture and depth in hair and fur.
All the info is here: Best Erasers for Drawing: The 9 Eraser Types for Artists
Blu Tack is another great drawing tool. It kneads to a finer point than a kneadable eraser. Try pressing or rolling knobs of putty into graphite and see the marvelous random textures it creates. Experiment. Use it for walls and rocks and tree bark and you will be amazed.
15. Draw Quick Landscapes and Practice
I suggest that you first learn to draw in your garden or in the countryside. Landscapes are very forgiving.
You can go wrong and still produce excellent work. You can play around with light and color, and move objects around, it’s not cheating, that’s how the great artists have always done it.
There is no pressure to be accurate with every line. No one cares if you leave things out or add them in. All landscape artists lie. They move things if it makes a better composition. Why not?
Landscapes are romantic, the feeling is more important than reality. You can draw what should’ve been there. Most photographers feel bound by recording the truth, a constraint that most artists don’t have.
This is how I draw distant trees: How to Draw a Forest Background the Easy Way
Sit down in front of an old tree. Draw the trunk and all its shapes and shadows. Draw the branches and foliage breaking away at every angle, and remember, it doesn’t matter if it goes wrong. Who cares?
Stop looking at the trees and learn how to draw shapes instead. Draw quick sketches, a few minutes at a time, and that will train you to see only the bigger shapes.
You won’t see every branch or leaf, your brain will ignore them. The canopy or foliage and the tree trunk, are all you will notice at first.
As you gain confidence, extend your time, but always draw shapes within shapes.
As a drawing exercise, it doesn’t get any better.
16. Don’t Erase All Your Sketchlines
Don’t feel compelled to erase every mistake you make. Your sketches will retain life if the construction lines are left alone. Include them.
I’m a fine one to talk and it’s easier said than done. I’m such a perfectionist that I get obsessed with getting things right and I rub out the rest. That being said, and in retrospect, I can see that my most polished drawings are not always the best artwork.
Less is usually more. Knowing when to stop is a nut that’s hard to crack. I have a habit of over-finishing my work. Most of my drawings were better before I finished them.
This post will help: How to Make Your Drawings Interesting: 14 Ways to Improve
Sketching encourages you to leave the lines where they are, pick the best, and emphasize them. I urge you to learn your craft of drawing by trial and error. You’ll learn so much more.
17. Experiment With Your Drawing Paper
Paper texture can affect your drawing in a number of ways. Changing your paper can improve your drawing enormously. Experiment by drawing the same object on different surfaces and you’ll see how different your drawings are.
You have a number of paper choices:
- Cartridge: The standard drawing paper used by most graphite artists and available as ‘fine-grain’, ‘smooth’, ‘heavyweight’, ‘medium surface’, and ‘rough texture’. Each brand has its own grading system. Many artists love Strathmore 400
- Bristol: Ultra-smooth paper or board, often used by illustrators. Great for pen and ink, markers, and line art.
- Pastel: Pastel paper makes a great drawing paper, especially for charcoal or pastel pencils. The texture is delightfully grainy. Play around with mid-tone paper and use a white pastel pencil to add highlights. Numerous artists online use Pastel Mat paper.
More info here: What is The Best Paper for Graphite Pencil Drawing?
You can also use watercolor paper but it’s a bit over the top for most beginners. It’s too expensive. Great if you intend to add a color wash, otherwise a quality drawing paper is better.
How to Get Better at Drawing and Improve Your Skills: Final Thoughts
If you want to improve your drawing skills, set aside time for deliberate practice and get into a drawing routine. Draw simple subjects from life and don’t give up when things go wrong, because they will.
It’s your job to find a way around every problem. They’re only setbacks, not defeats.
Don’t be too harsh on yourself, try to be the best artist you can, and don’t compare yourself to the artists you’ve seen on social media.
Advance in small steps and build upon your success. All skills take time to learn. If you put in the effort your drawings will improve dramatically over time.
Aspiring artists should be patient and realistic about what they are going to accomplish. Believe me, the goalposts move.
People look at my stuff and assume that I intended to draw the image they see. In truth, they only see the best I could do at the time, and that’s not the same thing.
Everyone is critical of their own work, don’t think it’s unique to you. Think of it this way, you have already started out with some drawing skills that many people would count themselves lucky to possess. Be happy with that.
Hopefully, there is a nugget or two in this list of drawing tips that will help you to advance forward, get better at drawing and improve your skills.
Read this for more information: What is The Best Paper for Graphite Pencil Drawing?
Now if you are ready to take a leap forward, check out Stephen Bauman. His drawing techniques are second to none. His course is on Proko
If you like the way I draw and want to try things for yourself, this is my basic kit
Why stop there? You can learn to sell your drawings too and I’ll show you how to do it, step-by-step.

If You Want to Sell Your Art
Check this out!
Psst…it’s only $12.99!
You’ll also be interested in these posts. Check them out:
- How to Protect and Preserve Your Drawings and Avoid Disaster
- Are Drawing Books Worth It? Can You Learn From Books?
- How to Trace a Drawing: 12 Ways to Get Results – Fast!
- Best Easel For Drawing and Painting: How to Choose
- How to Scale Up a Drawing in 4 Easy Ways and Save Time
- 7 Types of Contour Drawing Explained: Quick and Easy
- How to Know When Your Drawing is Finished: Don’t Ruin it!
- How to Draw Texture in Pencil: 6 Tips to Get Results – FAST
- Tracing Art – Is It Good or Bad? When Is Tracing Cheating and Is It Ever OK?
- How to Draw Water in Pencil: Drawing Water The Right Way
If you need more help with drawing, then I urge you to check out
Dorian Iten on Proko. His course is reasonably priced and inspiring!
Pin For Later


Hi, I’m Kevin Hayler
I’ve been selling my wildlife art and traveling the world for over 20 years, and if that sounds too good to be true, I’ve done it all without social media, art school, or galleries!
I can show you how to do it. You’ll find a wealth of info on my site, about selling art, drawing tips, lifestyle, reviews, travel, my portfolio, and more. Enjoy