Kevin Hayler: Professional Wildlife artist, author, and traveler.
I can show you how to draw water in pencil. There are rules you can follow, tools you can use, and drawing techniques that will allow you to draw realistic water with relative ease.
Many artists find drawing water difficult, yet with a little knowledge and some patience you can take your drawing skills to another level.
If I could sum up the rules in the shortest way possible I would say this…
When drawing water, darker shapes will reflect lighter, and lighter shapes will reflect darker. Water reflections will appear darker than the sky above. Reflections reveal the undersides of an object and NOT the mirror image. And finally, water reflections always lose detail.
Ready to get started? Let’s see how they work in practice.
Disclaimer: When you buy something via my affiliate links I earn from qualifying purchases and sometimes earn a commission, at no extra cost to you. I am an Amazon Associate among others. I only recommend trusted sites.

How to Draw Water Reflections
Reflections in still water are the easiest water effects to draw. The ‘rules’ apply clearly without all the complications of moving shapes and wavy lines.
A dark bank of trees reflecting in a still lake will appear lighter in the reflection. The value of the drawing reflection will change depending on the color of the water, but the rule remains constant.
The reverse is true when light objects reflect. They appear as darker values in the reflection. A white boat, for example, will reflect as grey.
THE RULES OF DRAWING WATER REFLECTIONS IN EASY STEPS

Painting by John Singer Sargent

Painting by John Singer Sargent
N.B. Water reflections are rarely the exact reverse image of the subject
Let’s assume we are adding some trees to a landscape, set back from the water’s edge. There is some land in-between the trees and the water. If we were to flip the trees over from the base, only a portion of the reflection would cross the waterline.
Now in this first tutorial, let’s look at a landscape with simple shapes, and work out where the reflections would be. This is a quick sketch I made to demonstrate the rules, such as they are.

STEP 1: I sketched a clump of trees in a landscape and drew an imaginary waterline. An amateur would flip the whole scene and draw the reflection, like a mirror, but this is not quite what I do.

STEP 2: The first thing I had to do was indicate a riverbank. I drew a slim reflection along the waterline. I diffused the detail.

STEP 3: I flipped the tree reflection vertically, blurred the detail, and rendered slightly lighter tones. It’s important that the reflection starts from the base of the tree.

STEP 4: I do exactly the same thing with the clump of trees to the right. I flipped them over, from the base, and because they are further away, the refection crosses the waterline higher up. You can only see the foliage.

STEP 5: I repeat the process on the left. The crown of the bare tree is clearly visible in the water, but the far tree is only just showing. You’ll note that the horizon line doesn’t appear as a reflection at all.

STEP 6: To add some authenticity I added a grey gradient to the water. Light skies reflect darker in water and make the scene look life-like.
Related post: How to Draw a Forest Background the Easy Way
Given that I’ve created this landscape out of my imagination, it looks reasonably authentic. Few would challenge the perspective. However, there is one element that is wrong, but we need to use another example to highlight the issue.
There is no need to draw it. A photo will show you how reflections work in reality.
The reflection will be exactly vertical to the subject but, and this is important, it’s not a mirror image. The reflection will reflect the UNDERSIDE of the animal.
THE SIMPLE STEPS OF DRAWING REFLECTIONS

Look at the sheep on the left above. You can see the underbelly and the underside of the chin. Do you see? Plus the reflection starts at the base of the subject. In this case the reflection starts where the hooves touch the surface.
That’s crucial to understanding how reflections work.
Contrast that with the reflection on the right. This demonstrates an exact mirror image. Do you see how the perspective is all wrong? Only one foot reflects from where it touches the base. There are gaps between the other feet and the start of their reflections.
Using geometry to work things out, with perspective lines and vanishing points, doesn’t help you to figure out what the underbelly looks like. For that, you’ll need a reference.
Here’s another example of a water reflection using one of my drawings.

Notice how the tiger’s reflection is foreshortened. I viewed the tiger from above and from a distance. The whites are noticeably darker in the reflection and I’ve simplified the ripples. In real life, there were reflections everywhere.
I distilled the overall shape down to its simplest forms and cut out the confusion.
When I’m stuck, I try to find a photo online that matches my needs. I might, if I’m lucky, have an image buried somewhere in my ‘archive’ of rejected shots. If not, it’s onto Instagram and Google to try and find something similar. The search can be frustrating.
I like to save images when I find them. If I come across an image that reminds me of a photo I’ve taken in the past, I will save it. I might need the reference at some point in the future. It’s my digital scrapbook of potentially useful stuff.
It’s good practice to have a scrapbook file, you should start one.
Most artists use photographs. If that worries you read this: Is Drawing From Reference Photos Bad? Are You Cheating?
Why aren’t you selling your art? If you need a helping hand, I can show you how to do it, Step-by-Step!

How to Draw Water Droplets and Splashes
One look at a picture with water splashing everywhere and the idea of drawing it is overwhelming. It is, however, one of the easier effects to master. It’s all about technique.
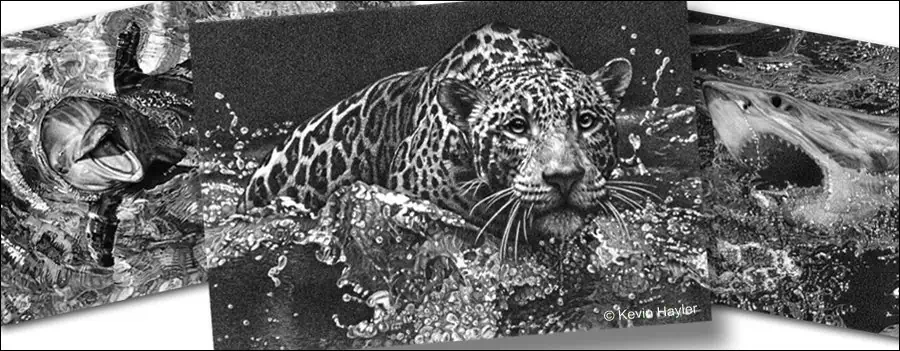
Again it’s easier to use an example to demonstrate my point. Let’s take a look at this bad boy.

It might look photographic, but that doesn’t mean I copied everything super accurately. I didn’t. I was far more interested in getting the effect to look authentic.
Near enough is good enough.
My priority was to draw the shark accurately before I attempted the water. When I was happy with the way it was going I started to block in the sea using an HB pencil using a 0.3mm mechanical pencil

Read this for help: Can You Draw With Mechanical Pencils? Yes, and Here’s How
I laid a mid-grey base tone.
I made the dark shades darker with a B-grade pencil, and then it was a matter of ‘lifting out’ the lighter tones using a combination of erasers.
- I used a Tombow Mono Eraser Pen for the smaller ripples,
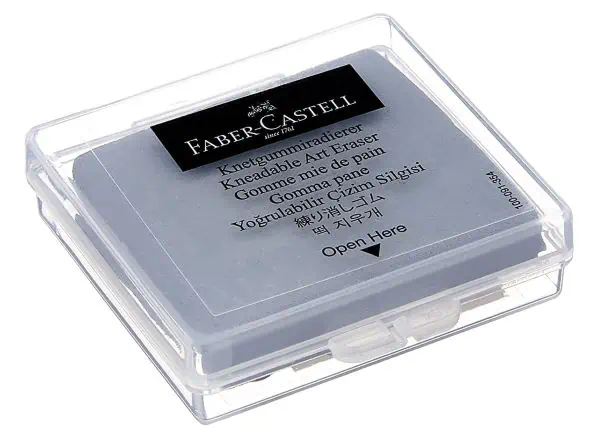
- A Faber Castell Kneadable Eraser for larger areas using it to dab the paper lightly,
- Blu Tack to press against the graphite and lift clean patches of graphite without smudging
- A Jakar Battery Eraser to lift the sparkling highlights
I went back and forth, erasing, shading, and erasing until I was confident that everything looked authentic and balanced.

I’m glad I managed to keep the black water looking clean and smooth. I resisted the temptation to add different shades and more complicated tonal values.
The contrast between the plain simplicity of the darks against the complexity of the surf makes the image much stronger.
This is how I stop my drawings from smudging: Prevent Your Drawings From Smudging: The Ultimate Guide
Amateurs often assume that experts know exactly what they’re doing at all times, but that’s not the case. There is a lot of trial and error and calculated guesswork.
Don’t be too concerned if things go wrong. Step back and take a break. You can usually pinpoint your errors when you return with fresh eyes.
The icing on the cake happens when you use the battery eraser to draw the dots and squiggles at the end and the water starts to move.

By breaking down the drawing into stages, starting with the darker tones and progressively ‘lifting out’ lighter areas, a seemingly impossible task is made achievable.

Drawing the realistic water droplets, in this drawing of a jaguar, was very satisfying.
- The first step is to take a battery eraser and make random dots. Don’t make them all perfectly round, draw wonky shapes,
- Choose a few random droplets and add tails to the bottom of the drop
- Determine the direction of the light source and shade the water droplets with a hard pencil.
- Make one side darker and the opposite side lighter.
- I left a thin white rim surrounding the droplets.
- Highlight the dark side, with a dot of white, using the eraser pen.
You now have a very realistic water splash. Drawing a single drop of water is not a difficult task. The main thing is to remember to draw all the highlights coming from the same direction.
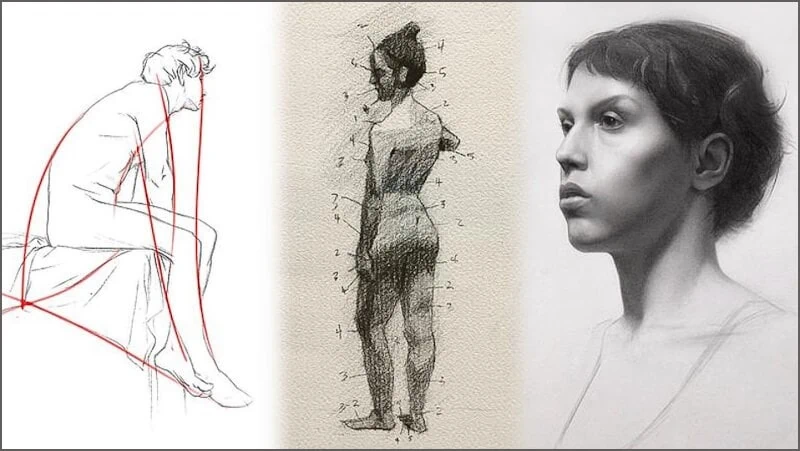
If you need more help with drawing, then I urge you to check out
Dorian Iten on Proko. His course is reasonably priced.
How to Draw Water Ripples
In stark contrast to the previous drawings of water which look so challenging, but were relatively easy, the next example of a duckpond was insanely difficult to draw.
It’s always the same, whenever I get over-confident, I’m brought back to earth with a bump. I assumed that drawing water ripples would be easy, and was anything but.

The duck itself was reasonably straightforward. I used hard pencils to draw in the subtle greys of the plumage and ‘lifted out’ the highlights. This is my usual method.
The water reflection of the duck was fairly easy as well. The issue I had was making the shapes align realistically. They were, in fact, more distorted in real life and didn’t look quite right. I shifted them slightly.
If you like realism check this out: How to Draw Realistically: 11 Expert Tips For Top Results
Drawing the water ripples was a total pain. I went wrong primarily by choosing textured paper instead of a smooth surface.
I wasn’t going to give up and start again because I’d spent too much time drawing the duck already. My task was to draw a smooth water surface without the grain showing. As you can see that was only partly successful.

Heaven knows why I drew such a small grid. This is a very simple shape to block in. I used mainly very hard pencils for drawing the feathers.

You can see that the light feathers are reflecting darker in the water. I established the darks beneath the duck. I started to draw in the elliptical shapes and began to struggle. I tried to blend the tones with different grades of pencils.

I struggled because I was fighting the paper and refused to smudge the graphite. For years I resisted blending pencil thinking that it was a pointless technique used only by amateurs, I was wrong. All I did was make work for myself.

The water ripples in the foreground are sharper than those in the background. I had to lose detail in the distance. You’ll also notice that there is a slight gradient, beginning with a darker tone at the front which gets progressively lighter as it recedes.
A quick 55-second video of the duck and water ripples being drawn
We all get these ideas about the right and wrong ways to apply your medium and they can be hard to shake off. I should’ve used a cotton bud to gently smooth the surface, instead, I used various grades of pencil and tried to blend them ‘skillfully’.
You can’t use the right pencil on the wrong paper. Read this: What’s The Right Paper for Pencil Drawing? (How to Choose Wisely)
To add to my difficulties, I had to draw precise elliptical water ripples, each with its own gradients. I had no idea that drawing ellipses would be that difficult. If I was only a fraction out of line, the water illusion was lost.
I had to draw concentric ellipses, perfectly aligned, perfectly spaced, and with perfect gradients and tone. It drove me nuts, and I was constantly picking at anomalies and stray specks appearing in the paper grain.
This drawing represents one of the classic problems artists experience when they are continually ‘rescuing’ their artwork.
After investing so much time and effort, with some notable successes along the way, everything becomes far too precious. Fear sets in and you become afraid of losing all your gains. The fear itself inhibits you from making the right changes and you get stuck.
I suppose the key point I’m making is to choose your paper carefully and don’t get complacent.
How to Draw Clear Water
The fun starts when you want to draw something in clear water. Not only have you got reflections of light bouncing around, but you also have the body shape and shadow areas, all in one chaotic image.
I won’t kid you, it’s daunting, and every time I have pushed myself to the challenge, I’ve sworn I’ll never do it again. The image below is a case in point.

The key to drawing crystal clear water is to emphasize contrasts. The sparkles look best against the black background. You can see that more clearly below the dorsal fin. The ripples on the far left look good for the same reason.
It’s vital to retain the white highlights if the transparency is to be convincing. To that end, I made a huge effort not to smudge the surface of the paper in any way.
Nowadays I would ‘lift’ the whites out with a battery eraser, but I drew this many years ago and painstakingly drew around the dots, one by one.
As I couldn’t use color to separate elements in the image I retained the grain in the paper to indicate the sandy seabed while smoothing the dolphin’s skin with a paper stump.
The dolphin stood out more in my colored photo, but in monochrome, I had to use more contrast to have the same impact. I used some dark outlines to emphasize some of the major shapes of the dolphin.
I also had to make it clear that the focal point, in this case, the dolphin’s head was above the water. Only the top of its head is in perspective. The rest of the body underwater is distorted beneath the ripples.
It can be a challenge to draw a convincing animal underwater when viewed from above, the refractions may look great in a photo but bizarre in an illustration. Some judicious corrections may be required.
There are lots of drawing hacks to improve your work: How to Make Your Drawings Interesting: 14 Ways to Improve a Drawing
It’s not quite the same, but I can demonstrate the difference between reality vs artistic license with the penguin drawing below.

The drawing on the left is an old sketch of a penguin, seen through a tank in the Singapore Zoo. The dislocated head on the right side is how the photo (long since lost) really looked. The head appears separated.
You can imagine the looks of confusion if I’d presented the one on the right for sale as a finished drawing? No one would buy it.
Need help with getting started? Read this: How to Plan and Compose Your Art: A Guide for Beginners
The last image I will share with you is also a drawing I did of a river otter. I did it many years ago.

The challenge was to make the body visible in a mass of rippling water. I drew each ripple one by one. As with the dolphin drawing above, there was almost no ‘lifting out’ with an eraser. I drew this before I’d established any real technique. I was still experimenting.
It’s only the dark shapes at the sides that give form to the body, and the slightly lighter belly. I do remember readjusting the tones over and over again to get the balance right. It was only when I was in danger of ruining the paper that I stopped.
If disaster strikes read this post: How to Repair Drawing Paper: 9 Ways to Rescue Your Artwork
How to Draw Water: Final Thoughts
Drawing water doesn’t need to be so painful if you approach it in the right way. Remember the guidelines at the beginning. They will help a lot. Use your eraser to draw water and the most complex effects will be so much easier to achieve.
Now you know how to draw water in pencil.
If you like the way I draw and want to know what I use, This is my basic kit

If you can tackle drawing water, it’s time to sell your art. If you wanna live your dreams and make a living, you need to check out this guide!
There are more tutorials like this, take a look at:
- How to Draw Realistic Shadows in Pencil (All the Secrets)
- How to Draw White Lines in a Pencil Drawing (Without Going Mad)
- Drawing Realistic Grass the Easy Way: For Beginners
- Best Mechanical Drawing Pencils For Artists
- Tracing Art – Is It Good or Bad? When Is Tracing Cheating and Is It Ever OK?
- How to Draw Texture in Pencil: 6 Tips to Get Results – FAST
- How to Protect and Preserve Your Drawings and Avoid Disaster
- How to Scale Up a Drawing in 4 Easy Ways and Save Time
Pin For Later


Hi, I’m Kevin Hayler
I’ve been selling my wildlife art and traveling the world for over 20 years, and if that sounds too good to be true, I’ve done it all without social media, art school, or galleries!
I can show you how to do it. You’ll find a wealth of info on my site, about selling art, drawing tips, lifestyle, reviews, travel, my portfolio, and more. Enjoy