Have you ever lost yourself in a work of art that was so real you felt part of it? How do artists trick you into thinking that a flat surface is 3 dimensional? This is how artists create depth in a drawing:
Distant objects drawn in perspective, reduce in size, appear lighter, and lose detail. Hot colors advance and cool colors recede. Artists also blur the background and sometimes the foreground of a drawing to create the illusion of depth.
With that in mind, this post examines those techniques in more detail. It’s easy to follow.
Disclaimer: When you buy something via my affiliate links I earn from qualifying purchases and sometimes earn a commission, at no extra cost to you. I am an Amazon Associate among others. I only recommend trusted sites.
1. Create Depth in Your Drawing Using Scale
Ask a child to draw an avenue of trees and the chances are they will draw them side by side or even one above the other. Why? It’s because they know the trees are the same size and they draw what they know, not what they actually see.
Take two identical trees and place one at a distance from the other, and the furthest tree appears to be smaller. We can see they are not the same size.
This is a guide to show you How to Scale Up a Drawing
Now place those trees in a landscape drawing with a mountainous background. We know the mountains are enormous but we reduce them in size. The mountain range is further back and appears smaller than the foreground trees and the optical illusion is perfect.

This old sketch demonstrates the principle nicely. The viewer is looking at the penguins along a clear line of sight, it’s as if the viewer is snorkeling at eye level.
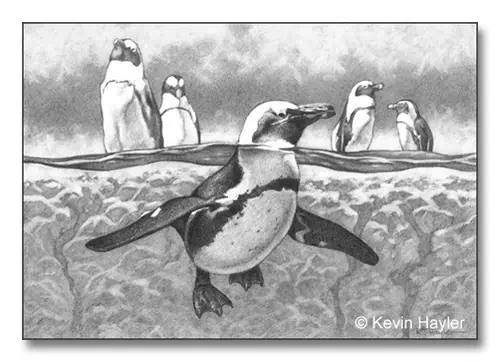
We know the penguins in the background are all the same size in reality, but we see them as progressively smaller. in less detail, and a little bit lighter shade and this gives the appearance of depth.
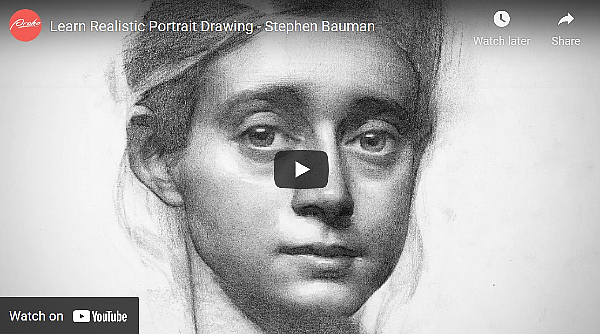
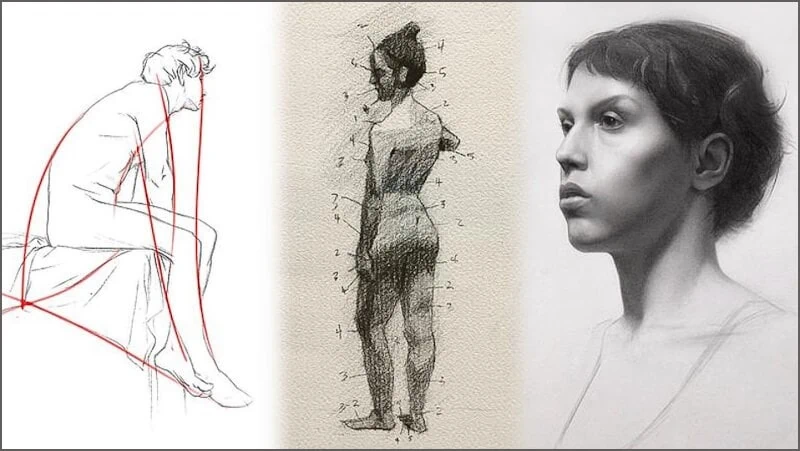
This is a popular drawing course by Stephen Bauman on Proko. He’s so talented it makes me ache!
2. Make Your Drawing Look More 3D Using Tonal Range
Artists can their knowledge of light intensity to manipulate the observer by exaggerating tonal differences.
The artist can have two objects of almost identical tones and separate them artificially by making one object appear much lighter than the other. The darker object stands out by comparison and moves forward.
The lighter object might be bigger but we accept that it’s further away because it is lighter.
Not only is this technique invaluable for creating depth, but it can also add mystery and atmosphere to the artwork too.
Create Depth Using Overlapping Elements and Forms
A minor point, but one that needs iterating I think. Placing objects behind each other, and overlapping, not only reinforces a sense of depth, but it’s also more pleasing to the eye. Compositionally, the image will feel more cohesive and blend naturally. We seldom see things separately.
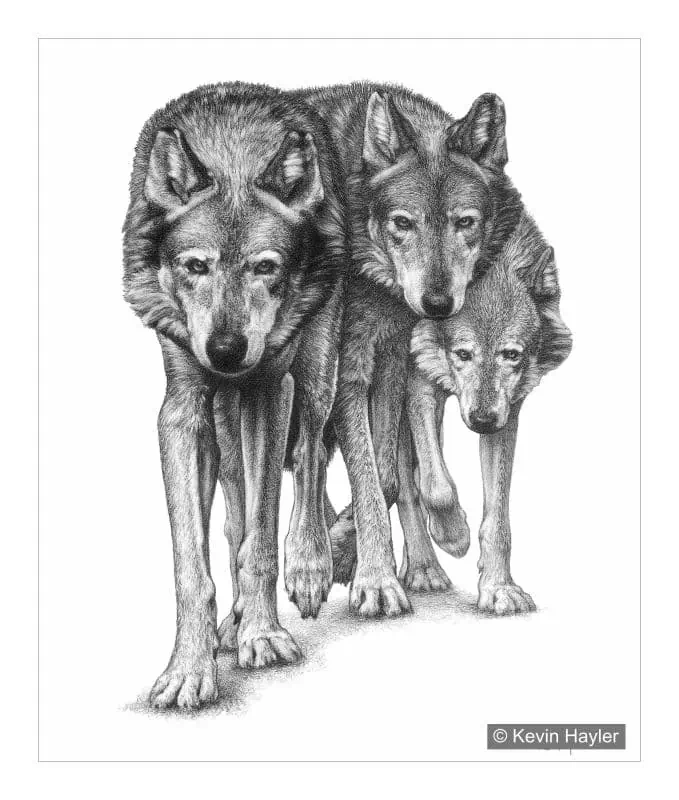
This drawing is an example of overlapping subjects. I only had photographs of one wolf and I selected the best 3 poses and drew them together as one. The perspective was tricky. I think it just about works.
You’ll notice the front wolf on the left, has darker values than the rear wolf on the right. There is a gradual transition of tone and size and it works quite well.
3. Create Depth in Your Artwork Using Color
The tonal range is straightforward for monochromatic drawing, but not so clear-cut in a painting.
Colors tend to mute and fade in the distance, but not always. When the air is crystal clear and there’s no atmospheric haze, the color of background objects can be surprisingly vivid. That’s where warm and cool colors make a difference.
The warm colors, such as reds, oranges, and yellows, hit the eye more powerfully and jump forward. The cool colors like blues, greens, and purples recede.
Knowing these rules allows two different colors with identical tonal values, but opposing temperatures, to sit side by side and create the illusion of depth.
Like many men, I am red/green colorblind. I can’t see color very well, but I do know how color works. Indeed I started my art life as a painter.
This might interest you: How To Sell Landscape Paintings
I learned the rules. The rules work so well that it’s perfectly possible to replace the right colors, with dashes of the wrong color, as long as the color temperature is correct.
I routinely added green to shadows on my portraits for instance and I never had a negative comment. Quite the reverse, I was complimented for having a keen eye for color. How ironic is that?
4. Create The Illusion of 3D Using Sharpeness and Blur (Depth of Field)
We can’t talk about the illusion of depth in an image without acknowledging the influence of photography.
Before the advent of photography, you didn’t see the depth-of-field effect simulated in artwork. Distant hills may have been indicated in a few brush strokes but never combined with the foreground too.
A sharp focal point with blurred surroundings revolutionized the way we perceive distance and the illusion of space.
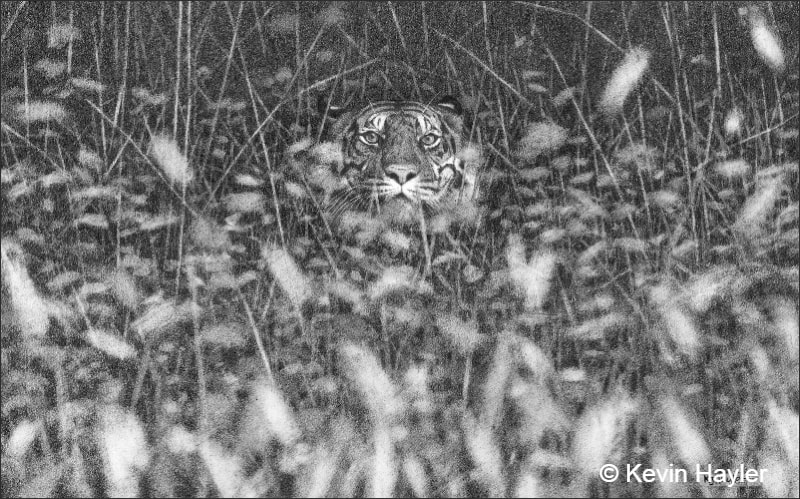
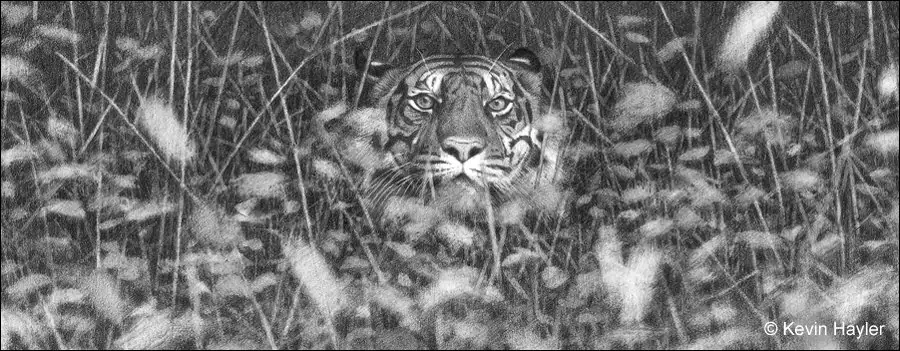
Take this drawing as an example. It wouldn’t exist without the influence of photography. The only reference I had was the tiger I saw in London Zoo. The rest is a construct.
I shaded the dark background with a soft pencil, dabbed the paper with a piece of Blu Tack, and dashed the foreground with a putty eraser. It looks like out-of-focus grass. The only hard edges are to be found at the focal point, namely the tiger’s head. The rest of the drawing has soft edges.
It’s a very old drawing and if I drew it today I’d take more care, but hey, it works fine and people still buy the print.
5. Creating Depth in Your Drawing Using Perspective
We already know that sizes reduce with distance but they will only look authentic if the linear perspective is applied properly
So many artists get the perspective wrong. There has to be a focal or vanishing point to a distant horizon line. It’s very easy if you’re drawing a building. Your horizon will be your eye-line and the angles of the building will converge to spot along the line.
If you look at the building from an angle there will be two vanishing points, one on either side. Three if you are looking down from above.
The rules are the same for every object but it can be much more confusing to see where the vanishing point lies if you are drawing a person or an animal.
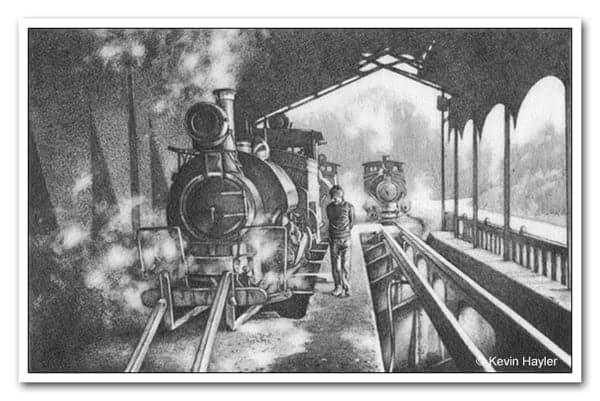
The example below shows how lead lines draw your eye into the picture. It uses one vanishing point perspective. Notice how the rear engine is lighter and smaller. Now take a look at the railway lines, can you see the gradual changes from darker at the front to lighter at the back?
It’s the same with the pathway. It’s a different surface but the same rules apply.
The most common mistake I see amateurs make is to believe the camera doesn’t lie. Not true. We’ve all seen the kind of thing I’m talking about. The dog with a giant nose and strangely short legs.
The trick is to recognize the error and compensate for the distortion in your drawing or painting.
Any photo taken with a wide-angle lens below 50mm focal length will mislead your eye. The image may look fine as a photo but will look totally wrong as artwork or an illustration.
One way to correct the distortion, apart from being competent with Photoshop, is to look at the vertical lines. A wide-angle lens will make vertical lines lean towards the center. Correct the verticals and most images will fall into place.
If you need more help with drawing, then I urge you to check out
Dorian Iten on Proko. His course is reasonably priced and inspiring
6. Add Depth to Your Drawing Using Shadow
Without shadows, the objects in your artwork will appear to be floating in space and lifeless. You’ll have a flat drawing. The shadow gives the subject, or object, a firm base.
There is always a shadow, even in soft light. The drawing below has very strong contrast but even so, look at the cat’s front paw and the base of the chair legs. They all have a dark area at the base. There’s a darker shade even though they are already in shadow.

What are we to learn? It means the shadow isn’t flat. Shadow areas vary in tone for different reasons and when we know why we can draw shadows that look realistic.
The main light source in this image is coming from the left and the shadows are on the right side, yet we see reflected light everywhere.
It’s most noticeable in the shadow beneath the chair. Look at the middle and you can see it is lighter than the edge. I deliberately exaggerated this effect. I know from years of experience that the edges of shadows tend to look darker and softer. Shadows rarely have a sharp clean edge.
I also know that the opposite side of the light source almost always has reflected light, and it’s this secondary light source that gives an object its depth. I add reflected light even if I can’t always see it. It works.
Interesting shadow gives your artwork real definition and the illusion of being three-dimensional. Without shadow, the whole picture would be cartoonish.
Being generous with contrast often improves the drawing. It doesn’t matter if the contrast was not apparent in the original photo, add it anyway.
This will teach you How to Draw Realistic Shadows with Pencil
If you ever need proof that shadow and depth are inseparable just look at how the drop shadow on each of the images on this post lifts the picture off the page.
7. Add Depth to the Details of Your Drawing
I’ll end this post by taking a look at the detail of this elephant’s eye. It’s an enlarged section of a larger, very detailed drawing.
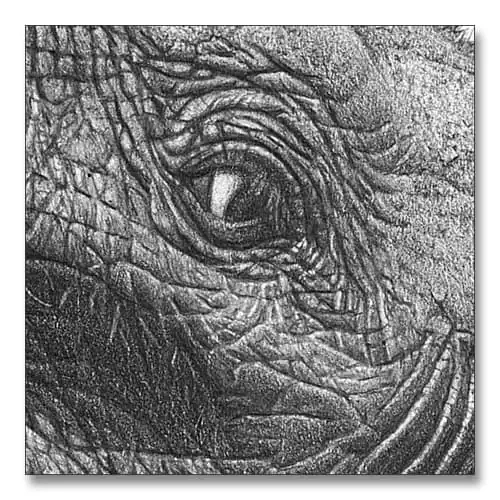
by Kevin Hayler
Notice how I drew the wrinkles as a dark line with a highlight running along one side. You’ll see that repeated everywhere. A gradation of tone simulates the curved folds. There’s also a shadow beneath the eyelid and gradation on the eyeball.
Depth is more than just playing with the perspective, it’s in the texture too.
You’ll find out more in this post: How to Draw Texture in Pencil: 7 Tips for Realistic Results

Ways to Create Depth in Your Drawing and Look More 3D: Final Thoughts
Sometimes I think of drawing as a puzzle that needs to be solved. I’ll get there eventually but the way is not always obvious. Creating a convincing sense of depth can be like that; you know when there’s something missing, but you can’t always figure it out.
When you can no longer see the ‘wood for the trees’ put the drawing to one side and when you return, with fresh eyes, those finishing touches will be more apparent.
There you have it. How to create depth and make your drawings appear 3D. This should help.
If you like the way I draw and want to know what I use, This is my basic kit

If this post has helped you, I’ve got more for you. I can help you to sell your art too. I’ll show you how in the most practical way. Take a look!

If You Want to Sell Your Art
Check this out!
Psst…it’s only $12.99!
There are more posts like this one for you to enjoy:
- Tracing Art – Is It Good or Bad? When Is Tracing Cheating and Is It Ever OK?
- How to Trace a Drawing: 12 Ways to Get Results – Fast!
- Is Drawing From Reference Photos Bad? Are You Cheating?
- Drawing Realistic Grass the Easy Way: For Beginners
- What is The Best Paper for Graphite Pencil Drawing?
- Drawing Ideas for Adults: 120 Cool and Easy Things to Draw
- How to Draw White Lines in a Pencil Drawing (Without Going Mad)
- How to Make Your Drawings Interesting: 14 Ways to Improve a Drawing
- Can You Copy Art and Sell a Painting of a Painting? I Found Out
Pin For Later


Hi, I’m Kevin Hayler
I’ve been selling my wildlife art and traveling the world for over 20 years, and if that sounds too good to be true, I’ve done it all without social media, art school, or galleries!
I can show you how to do it. You’ll find a wealth of info on my site, about selling art, drawing tips, lifestyle, reviews, travel, my portfolio, and more. Enjoy