
Kevin Hayler: Professional Wildlife artist, author, and traveler.
Accidents happen. We’ve all been there, coffee splashes, tears, and buckles, they can all feel like a total disaster. Well, all is not lost. It’s possible to rescue your art from all kinds of mishaps. I will teach you how to repair drawing paper – most of the time.
Paper tears and holes can be fixed using archival paper tape or a Japanese paper patch pasted on with wheat starch. Waves and buckles can be ironed out or removed by sticking the drawing paper to an acid-free, self-adhesive board. Scored paper can be disguised with a sharp pencil point, texture restored with a workable fixative, and stains can be removed with a cotton bud and a diluted bleach solution.
While prevention is always better than a cure, let’s explore what you must do if the worst happens.
Disclaimer: When you buy something via my affiliate links I earn from qualifying purchases and sometimes earn a commission, at no extra cost to you. I am an Amazon Associate among others. I only recommend trusted sites.
1. How to Repair a Buckle in Your Drawing Paper
It is so annoying you see a thumb buckle in the middle of your artwork. If your art is for sale this is serious stuff, you can’t ask top money for damaged goods.
The very first thing to do is to carefully flip the paper over and burnish the buckle from the back.
Use a blunt nib. If the buckle is very slight, I’ll use my fingernail, if not, and it’s more pronounced, I will ease the buckle ridge using a ball-headed ‘indentation pen’. Alternatively, use the wrong end of a pen, just go easy.
Massage the paper until the paper is smooth. If you cannot remove the dent entirely, place the paper face down, on a cutting mat, and burnish it again on a firm surface.
2. How to Restore Wavy Drawing Paper
Waves in the paper can occur for various reasons. The most likely cause is humidity, but warping can happen if the paper has been overworked or if it’s been in full sun.
If it’s your own fault and you’ve stored your paper in a damp environment, it’s often possible to dry the paper out using a dehumidifier. I have just rescued a pile of prints by drying them out overnight. It worked a treat.

It doesn’t always work, there are times when the wave is stubborn. The easiest answer is to mount the artwork on an acid-free self-adhesive board.
I’ll finish my drawing and get a professional scan made before if the dehumidifier doesn’t work I use an acid-free self-adhesive backing board.
I found LionPic (UK) or Redimat (US). These are sites to show you what I mean. They are not endorsements. I use a local supplier.
Sometimes it’s the only way to save the artwork. It works for buckles, waves, and creases.
3. How to Flatten Buckled Watercolor Paper
Ideally, we would always stretch a watercolor paper before applying a heavy wash, but in the real world this often doesn’t happen, and the paper buckles. This is how to fix the cockled paper.
Lay a piece of acid-free mountboard (matboard) on a flat clean surface. It should be slightly larger than the watercolor paper.
Place the painting face down on top of the board.
Lightly spray water over the back of the watercolor paper, enough to make it damp. Do not soak it or allow water to seep onto the front of your watercolor painting. You can use a damp sponge if you haven’t got a spray bottle. Cover the paper evenly.
Place another mountboard over your damp paper.
Pile some very heavy books on top to weigh it down and leave it overnight to dry out. The paper should be as flat as a pancake the next day.
- How to Store Drawings Safely: The Ultimate Guide
- What’s the Right Paper for Pencil Drawing? (How to Choose Wisely)
- How to Protect and Preserve Your Drawings and Avoid Disaster
4. How to Repair a Scratch or Score in Your Drawing Paper
There are times when you press too hard with a pencil and score the paper, or you drop something and scratch the surface. A sharp line will not vanish using the indenting method or sticking the paper down, instead, you will have to disguise the problem.
A groove in the paper will leave an indented white line when you shade over it with a pencil. To mask it, trace along the groove with a sharp pencil and infill to disguise the score.
The reverse will happen if you score the pencil drawing itself. The scratch will leave a black line. Take a piece of Blu-Tak, or a putty eraser, lighten the mark and go back over to match the surrounding tone.
Be extra careful if you use a grid to map out your drawing. Paper cannot be unscored. If it happens you may have no choice but to shade in the background you originally intended to leave white.
5. How to Repair a Tear in Your Drawing Paper
I’ll own up, this is not a method I have used but I’m so pleased I came across this information in my research.
Tears can be fixed using archival paper repair tape. It’s the tape conservators use to repair important documents and books.
The tape is cut to size, stick the strip along the rip on the reverse side of your paper, and burnish it down using a spatula or teaspoon.
Care must be taken not to leave any potentially acidic fingerprints on the sticky side, so snip off the end you hold. Use tweezers if you have to.
The tear will be almost invisible but you may have to draw over it to ‘lose it’ properly. I suggest you use the thinner mending tissue if you wish to draw over the tear, it’ll be less visible.
A similar technique can be applied to fix small holes. Tape should be enough to reseal a pinprick but a gap can be filled with the addition of a small dab of gesso. Add a tiny amount of color to match a tinted paper.
The other way is intriguing, but it’s probably best left to professional restorers.
You will need Japanese Kozo paper, a very thin but strong paper made from Mulberry tree fibers and wheat starch paste to adhere it in place.
The wheat starch is a powder you mix with water and heat it into a gel. It’s applied to the ‘scarfed’ paper tear first using a small paintbrush, and the paper is joined together.
Next, a tiny strip of Kozo paper is cut to follow the rip line. Tutorials suggest the repair is less visible if you tear the strip rather than use a craft knife or scissors.
The wheat paste is diluted into a watery solution and applied to the patch evenly. The paper is placed over the tear and the repair is rubbed down. Place a sheet of silicone paper over the tear before burnishing if you want to avoid it getting shiny.
In other words, use the tape method!
N.B. All, the supply links are below. Keep scrolling
6. How to Fix a Crease in Your Drawing Paper
If you are feeling brave you can flatten a crease in the paper with an iron. Plenty of Youtube videos on this but I didn’t see an example of anyone risking serious art.
The most convincing was the chap in the video below removing the creases in a map. All he does is wipe the creases with a damp paper towel. He lays a sheet of paper over the crease, as a barrier, and irons on top using a warm setting.
7. How to Remove Stains From Your Drawing Paper
Another common mishap is accidentally splashing the paper. Food and drink are the usual culprits. Take my advice and keep your snacks away from your art and NEVER blow dust from the surface.
If the worst happens, all is not lost.
Firstly, dab the wet stain with a paper towel. Absorb as much of the liquid as you can. Don’t rub it. Dab the stain with a clean dry towel. The stain will usually disappear or be so mild that you can draw or paint over it.
If the stain is old and dry, dab the stain with a damp paper towel or cotton bud and dab it again with a dry towel. Repeat the process. It’s not perfect but you may still be able to work over the damage.
If not, there is another step.
Dampen the stain once more. This time dip a cotton bud into a weak dilution of bleach, try 20:1, and dab the stain. Dab it once more with the damp towel and then with a dry towel. The stain will, hopefully, disappear.
If not, you may have to gradually strengthen the dilution.
The bleach method will work on white watercolor paper and on thicker drawing paper but it’s not suitable for colored paper.
8. How to Restore Texture to Your Drawing Paper
Sometimes you end up overworking the paper and losing the grain. Without the tooth, the graphite lies flat and out of style with the rest of the drawing.
Try spraying the affected area with a workable fixative. No need to spray the whole drawing.

Erase the bad patch and cut a hole in a separate sheet of paper to match. Spray the patch with the paper ‘stencil’ raised above the surface. The idea is to soften the edges as you spray and avoid a hard spray line. The damaged paper will regain some ‘bite’ as you draw over it.
The other option is to simulate the grain by drawing it back in. If the tooth has gone and the speckled effect has disappeared use a battery eraser pen to bring it back.
Simply sharpen a battery eraser nib to a ‘pencil’ point using a piece of emery paper. Now dot the speckles back in using a very light touch. The vibrancy is restored.

9. How to Remove Insects Safely From Your Drawing Paper
And last but not least and the bane of most artists working outside – INSECTS. They get squished. I’ve come closer to losing my work by squashing insects than anything else I can think of.
I usually sit outside and work, I’m not a studio artist by choice, and that presents a problem. Insects are art lovers and just have to stop by for a look.
This is what you don’t do:
- Flick them
- Blow them away
- Brush them off
Why? Because by flicking and brushing them away with your fingers you end up with a bright red smear scaring your paper.
Blowing them doesn’t always work either. Some of these bugs grip on for dear life. You blow harder and spray them with spittle. Yuk.
I’ve learned to ‘guide’ them off my paper. I shoo them out of harm’s way or gently nudge them with a paintbrush and encourage them to climb aboard.
Sadly, there are still a few that go unnoticed. I have to check the surface of anything I place over the paper, just in case.
When the inevitable does happen, I remove the body delicately with a craft knife. Do not brush it. The worst of it can be removed and then very lightly scraped over. Sometimes that’s enough. At other times I also use a battery eraser to remove the remaining residue.
If that’s not enough, you have to treat it with a damp towel or cotton bud as I explained earlier.
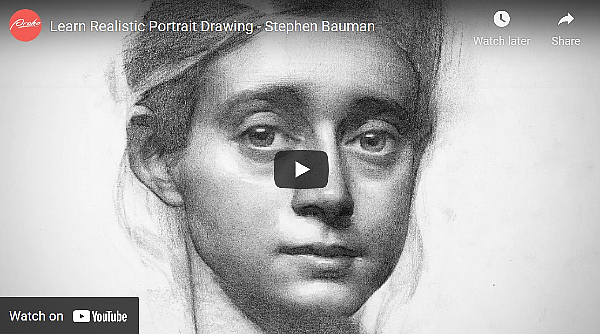
Stephen Bauman is a classically trained artist and has a very academic approach to his art. This guy knows his stuff and he’s a very good tutor
How to Repair Drawing Paper: Final Thoughts
It should go without saying, but I’ll say it anyway, before you do anything, test things out first. Impatience is your number one enemy. Hold back and consider your options before committing.
There is no need for a nervous breakdown, minor damage can usually be overcome.
It is possible to repair drawing paper.
This is a recap of the things you might need. I’ve linked them all to Amazon with my affiliate links:
- Indentation pen
- Dehumidifier
- Putty Eraser
- Archival paper repair tape
- Mending tissue
- Japanese Kozo paper
- Battery eraser
You’ve repaired and restored your art but how do you sell it? This guide will show you how. All you have to do is follow along. Check this out!

If You Want to Sell Your Art
Check this out!
Psst…it’s only $12.99!
There are more posts like this one, check these out:
- How to Draw White Lines in a Pencil Drawing (Without Going Mad)
- Tracing Art – Is It Good or Bad? When Is Tracing Cheating and Is It Ever OK?
- 9 Ways to Stop Pencil Shine in a Drawing and Save Your Work!
- How to Make Prints of Your Art – Printing Art Explained in Detail
- Are Drawing Books Worth It? Can You Learn From Books?
- Drawing Realistic Grass the Easy Way: For Beginners
- How to Draw Water in Pencil: Drawing Water The Right Way
- How to Scale Up a Drawing in 4 Easy Ways to Save Time
- Can You Copy Art and Sell a Painting of a Painting? I Found Out
Pin For Later


Hi, I’m Kevin Hayler
I’ve been selling my wildlife art and traveling the world for over 20 years, and if that sounds too good to be true, I’ve done it all without social media, art school, or galleries!
I can show you how to do it. You’ll find a wealth of info on my site, about selling art, drawing tips, lifestyle, reviews, travel, my portfolio, and more. Enjoy