
Kevin Hayler: Professional Wildlife artist, author, and traveler.
IMPORTANT UPDATE FEB 2025
Society6 is changing as from March 18th 2025. The original info in this article is now obsolete.
Please read this summary:
Society6 is shutting down many artist accounts as part of a shift to a more curated marketplace featuring on-trend designs. The move aims to reduce low-quality and AI-generated content and create a focused platform.
Artists affected will lose their accounts by March 18, while others will stay with updated royalty and submission processes. The decision has caused frustration, but there are alternative strategies for artists to continue growing their businesses.
For detailed information and advice, visit the full article: Society6 Update.
This means new members will have to submit their artwork for approval before joing the platform.
This decision is, without doubt, the consequence of an explosion of poor quality AI generated ‘art’ flooding POD sites. As always genuine artists are likely to get caught up in the filters and lose their income.
At this moment in time (FEB 2025) Society6 is transitioning to another business model and it remains to be seen whether this change will benifit artists and creators, or not.
It’s a matter of wait and see as they release the requirements for new submissions.
N.B. THIS IS A LEGACY ARTICLE
Do you dream of freedom and earning a passive income selling your art? It’s achievable if you’re prepared to work hard in the beginning. Print-on-demand sites offer artists, like you, that opportunity. In this post, I will tell you how to sell art on Society6, step-by-step.
To sell art effectively on Society6 you’ll need very large image files, at 300dpi, and saved as JPG and/or PNG files. They must be RGB, sRGB or Greyscale for reproduction. Simple images with plain backgrounds are the most adaptable for adding to more products.
If you’re excited about earning extra money and eventually a full-time income selling your art and designs, this post is for you. I’ll guide you through the entire process, from scratch.
Let’s go.
Disclaimer: When you buy something via my affiliate links I earn from qualifying purchases and sometimes earn a commission, at no extra cost to you. I am an Amazon Associate among others. I only recommend trusted sites.
Important Update: As of the 4th of May 2023, Society6 has introduced some new charges.
Sales made through Society6, or one of their third-party affiliates, now incur a shipping fee ranging from $0.10 for stickers, to $8.00 for Credenzas (sideboards). New fees are listed here. Fees are deducted from your earnings. A new tiered pricing system is due sometime in the fall.
Update Nov 2023: This is the new price plan.
| Free | Basic | Pro | |
| Design Limit | 10 | 100 | 1000 |
| Customizable Shop | Yes | Yes | Yes |
| Sell on Any Product | Yes | Yes | Yes |
| Worldwide Shipping | Yes | Yes | Yes |
| 24/7 Support | Yes | Yes | Yes |
| Set Your Own Prices | Yes | Yes | 10% of Net Sale |
| Quarterly trend reports, emails and webinars | Yes | Yes | |
| Sales Analytics | Yes | ||
| Exclusive discounts | 20% off Base Price | Buy at the Base Price | Buy at the Base Price |
What is Society6?
is an online marketplace where you can sell, share, and profit from your artwork. Society6 is a major print-on-demand site, and it sells a myriad of products, including art prints, canvas prints, tote bags, and iPhone cases. You name it, if it needs a design, they sell it. You might as well take some of the profit.
Society6 is an American platform that encourages artists from all over the world, to upload their art and designs and generate some extra income. Indeed for some, Artists, it enables them to make a living, full-time.
The business model is simple. The print-on-demand company, in this case, Society6, provides the showcase, the customer makes a purchase with your design on it, and you receive a commission.
All sorts of creatives can find a market and new opportunities to reach a wider audience and make a small profit with each sale. It’s simple and free to set up and involves a modest investment in time. There’s almost nothing to lose.
You do the original artwork and Society6 takes care of the rest. They take care of production, storage, and shipping. They even do some of the marketing, all you have to do, is follow the rules, upload sellable designs and market yourself.
On top of that, there are no commitments, you are free to sell your designs elsewhere, in fact, you should do so. Plus, the platform is open to all; anyone can open a store and sell their designs. If the public likes your work, they will buy it.
You have full control over what you sell. You can have as many or as few items as you wish, although, without 40 or 50 items for sale, it will be hard to get enough sales.
There are plenty of ways to increase your range with a few initial designs so don’t worry that you haven’t got 50 unique images. All will become clear as we progress.
Is Society6 Free and How Do Artists Get Paid?
Each Society6 product has a fixed price and you earn a 10% profit margin. That percentage remains the same but sometimes when a product is discounted your commission is similarly reduced.
The exceptions to the rules are Wall art, canvas prints, and framed art. They all have a base price but you are free to set your own profit margins.
You can set the price you want, but you must be pragmatic. You’ll be competing with some very talented artists and your prices will have to reflect the going rate.
There are no subscriptions, monthly fees, or listing fees at present although changes are happening and this will no longer be the case sometime in the fall of this year.
N.B. Society6 is following the lead of Redbubble and Teemill and introducing a tiered pricing system. At the time of writing nothing has been announced. I’ll update this post when I get the news.
Customers can pay with a credit card, via Paypal or Amazon Pay.
Creators are paid via Paypal on the 1st or 3rd day of the month following a 30-day ‘pending’ period. This is to allow for customer returns. Your commission is then marked as paid. You will have to set up a Paypal account if you haven’t got one and that will cost you $1.00.
The initial outlay is peanuts if you don’t include the computer and internet connection. If you are doing traditional art, you will have to get it scanned. That is another cost. You can buy your own scanner, or contract it out.
You must get high-quality files, so think long and hard before you cut corners. Your business will fail if you ignore the image quality.
I always advise having your own website, but you can start selling without one, by setting up shop on Society6 or similar POD marketplaces.
You will be saving on all the costs involved in selling from your own website. No hosting, theme, plugins, shipping, printing, and all the associated hassles and expenses.
The Pros and Cons of Selling Art on Society6
There is no such thing as a perfect platform, there is always a mixture of good and bad points. You will have to decide whether the good outweighs the bad.
The Advantages of Using Society6
- First and foremost Society6 is easy to set up your own shop. You don’t have to be techy to figure things out
- You can start trading before you have your own website
- There are no costs for opening a store ($1 verification fee)
- Society6 promotes its sellers on Social Media
- No admin, no shipping, no stock, no storage
- Some sales data to gauge what sells
- There’s a wide variety of products
- Edit designs within the platform
- No barriers to entry, anyone can set up shop
- Fairly passive selling
- An active community of creators
- The US-based company serves the biggest market
- Claim to have ethical and environmental policies
The Disadvantages of Using Society6
- It takes a few months to see any sales and longer to gain a good income
- It is not a substitute for owning your own website, it compliments your website
- The profit margins are small. You earn 10% on all products except for wall art.
- You must do the bulk of your marketing and self-promotion
- No direct contact with your buyers
- No data to discover anything about your buyers
- No quality control
- Fierce competition
- Great designs get copied
- Slow delivery times
- No official samples
- Very poor Trustpilot rating
- (New business model pending!)
Although you can make a brand within the platform and have an identifiable look and style, you cannot build your own audience. The customers who use Society6 are buying from Society6. They own the trade and control the mailing lists and retargeting of business.
You should read this post: 15 Ways to Protect Your Artwork From Being Copied
You are merely a contributor and as such, you would be foolish to rely on Society6 or any other 3rd party online platform. You should diversify your income streams for when the time comes when a platform changes direction. It happens. I did well on eBay until some algorithm changes.
N.B. That has just happened and big changes are coming in 2023
How to Set Up Your Society6 Account
- Go to the homepage and click ‘join’ in the top bar.
- A popup will appear and you must click the ‘create account’ tab
- Click the ‘upload art’ tab
Now you have to think of a username. Pause for a moment and think about this one. Once you have registered this name it can not be changed. It’s part of the link to your site.
Example: society6.com/username
It can be your own name or your brand name. You can use letters and numbers.
- Enter a username
- Display name
- Email address
- Password
- Sign Up
Your display name appears in your listings and profile header. This is what your buyers will see. It can be anything but realistically it will be your name or brand. This name can be changed and be spaced as separate words.
Enter your email and a password (min 6 characters) and you are set to go. There are two more checkboxes for discounts and a newsletter.
Check them both. It’s wise to keep up to date with trending products and you’ll want to know about discounted products, it’s the only way to get a cheap sample.
When you hit ‘Sign Up’ you are taken to a welcome page where you must click the ‘Get Verified’ button. This will take you to your Paypal account so you can accept payment. If you are new to Paypal this is where you’ll register, verify your identity and pay your $1.00 fee.
How to Personalize Your Shop
Although it’s not required to enter your details, you’d be foolish not to. Here you can enter your contact details, website, and social networks and personalize your profile.
Go back to the main page and click on the profile icon
On the new page click the ‘Edit Shop’ button.
In the popup window under ‘Appearance’ you’ll see more 3 buttons:
- Edit cover image – Click the upload file button. This banner should be 1000 x 100 pixels. It can showcase your designs, be a solid color, and/or have text, too. You can use it as another space to promote yourself.
- Edit avatar – The next ‘upload file’ button is for your avatar. That can be your photo or logo if you have one. This image must be square
- Edit bio – Society6 recommends writing in the 3rd person. Here you can write about your background. Keep it brief, to the point, and enjoyable. Include your achievements, influences, favorite subject, techniques, media, and those type of things.
If you appear on Google searches this is what people will see.
Click ‘Save Changes’ and your store will update.
Now you can inspect your efforts. Your profile page will have a banner with a profile picture in the center. Beneath that, is your display name, then your bio with a few interesting things about you. Below that you can add your social media links, your email address, and your website.

At this stage your shop is empty but before I show you how to add your images, I’ll just mention the importance of first impressions and layout. This page is the first thing potential customers will see, so make the best of it.
Go back and click ‘Edit Shop’ again and this time select ‘Shop Settings’
The settings you choose will be the default settings that appear each time someone visits your page.
You will see 3 buttons:
- Sort by
- Department
- Products
You can sort your first visible items by popular, new, and random selections. I don’t think there is much point in highlighting random images, it’s better to feature new or popular art and designs. There are two thoughts.
You can introduce your customers to your new products every time they visit, or try and push known bestsellers.
On the basis that the 80/20 rule (Pareto’s principle) dictates that 80% of your profits will come from 20% of your products, in theory, you wouldn’t change your display. However, that’s not good for returning customers. Ideally, regulars want to see new items.
On the other hand, most visitors are going to be new customers and it’s all new to them.
It’s a tough call. You’ll have to decide what’s best for you.
The customer can always choose for themselves in the sidebar anyway, and you can change your default settings whenever you like.
The next two buttons describe what you sell. By default, they are set to ‘All’ because you are yet to upload any images. You can go back and change them later.
If for example, you want to showcase your prints, next to the ‘Department setting you can select ‘Wall art’, and next to the ‘Product’ setting you would choose ‘Art print’.
Hit ‘Save’ to continue.
How to Upload Your Artwork and Designs to Society6
To maintain the quality Society6 lists the minimum requirements for each product.
Click ‘edit’ on a product and you will see the requirements. You will be limited by the size of your file. You can reduce the file but you cannot simply enlarge a file and expect it to print perfectly. Enlarging a file will pixelate the image and it will lose quality. That’s pointless.
There is a separate software that will allow you to enlarge images. I have some software from I bought it a few years ago and works a treat. Unfortunately, it’s another $100.
To enable your art or design to be printed on most products, big and small, your file must meet these requirements:
- Vertical images = 8000px x 12000px
- Square images = 12000px x 12000px
- Horizontal images = 15000px x 9000px
All images must be 300DPI for printing, which means 300 dots per square inch.
Your image must be either a flattened JPG file (no layers) or a PNG file and formatted in the RGB color mode, and there are a couple of other things you should know.
Jpg files lose quality each time they are saved, whereas TIFF and PSD files are lossless. So keep the master files in a lossless format and upload newly converted jpeg files. They are always better.
A PNG file is a file with a transparent background. These are useful when you want to print an image without any background color. You will need that option, especially for fabric designs.
Society6 clearly advises you to use the RGB color format if you can. If not they will accept sRGB format which is not so vibrant. For the best results, black and white photographs and illustrations should be in Greyscale
The Upload Process
Scroll down slightly and click the ‘Upload now’ button. Alternatively, go to the top bar and click the ‘Sell’ link on the right.
The next page is called ‘Artist Studio’, and at the top right, click on ‘Add New Design’.
A new window appears called ‘Add new design’.
The first instruction is to ‘Enter Artwork Title’. Make the title short and descriptive so your potential buyer can find it easily. If your image is one of a series of the same design in different colors, you can number them individually.
Add a suffix #1, #2, and #3, etc. and this will inform a customer that it is one image of a larger range.
The next instruction is to upload the file in the first tile below where it says ‘Upload Artwork & Select Featured Version’.
You can drag or drop a file or click ‘Select File’. Open the file you wish to upload from your computer. Depending on the file size and your connection this may take a while.
When it’s uploaded you’ll see a star highlighted at the top. This indicates that it will be a showpiece image in your store and in the ‘My Society’ section where your followers will see it.

If you have more variations, you can repeat the process in each adjacent tile.
When you are done, click ‘continue at the bottom right.
A new window asks you to read and accept the terms and conditions. Then click the checkbox and the ‘continue’ button.
The next step is to fill in the details in the left sidebar.
Your title is pre-filled and next you must select the category from the 5 options in the dropdown menu:
- Painting
- Drawing
- Collage
- Photography
- Graphic Design
I chose drawing.
The next task is to add good tags. This is an important thing for SEO. Do not ignore it. You have a maximum of 20 tags, use all of them.
Think about the way your visitor will search for your image and add the descriptive tags ‘keywords’ that relate to your artwork. For example, you can add color, style, medium, subject, and so on.
If you need to use a phrase, separate the words by a hyphen. For example, you would write ‘black-and-white’.
Enter each keyword into the box and hit enter on your keyboard to save it.

The next step is to add a description. This is to personalize the image and give it some background and context. Craft your description with the search engine in mind but do not stuff it with keywords. Write naturally. The description appears in searches so make it interesting.
The size of your file will determine the products that will appear.
Click on the ‘Save Details’ button.
Edit and Enable Your Products on Society6
Now you have uploaded your files to the system, they are previewed as tiles in your Artist Studio store. You can enable the ones that look good by moving the on/off slider at the bottom of each tile.
If you need to make some changes click the ‘edit’ button.
From the left sidebar, you can scaler the design up and down using the slider, and use the tabs below to center the image.
Click the ‘Save and Enable’ button.
A new window will pop up with a list of all the products in your store, and if you wish to apply the same fix to other items, tick the checkboxes to do it in one click. Otherwise, you can do them individually if you wish. Exit by clicking ‘Enable Products’ or ‘Skip This Step’.
Making Image Modifications
Your aim is to have your designs look good on as many products as possible. Saving your designs as PNG files will enable you to adapt them to fit different shaped items.
You can use single images or elements, with a transparent background and position them on vertical, horizontal, or square products.
If a single design element doesn’t work you can make duplicate patterns using the same image. This will work on wallpaper, shower curtains, and all types of fabric.
You can play with the image. You can flip a design and make a mirror image. You can make large and small elements, and change the colors, and the angles. You can mix and match different elements. The limit is your imagination. All this is possible with PNG files and a photo editor.
If you have an iPad download the Procreate app and get designing
There is another option. Society6 provides templates. They can be downloaded and used with Photoshop and any photo editors that accept PSD files. These templates are useful for products with awkward shapes, such as bags, cushions, and outdoor lifestyle products.
To find the template, go to the product and click ‘Enter’. at the top right and you’ll see a black button saying ‘Download Template’ Use this template in Photoshop to drag and drop your designs and use them with your chosen products.
N.B. Do not publish your images on products unless they look good. Remember you can zoom and center your images. If an item still looks poor, disable it.
Store all your designs in dedicated folders as Jpg and Png files, choose your products and upload your designs. If a design doesn’t look good, change it. Keep going until you have exhausted all possibilities. Now you have your own online store. There is only one thing left to do.
Look to the bottom of the left sidebar, check the box to confirm that all your designs are your own, and hit… Publish Artwork!
Your online shop is now live.
Pricing Your Artwork on Society6
Society6 has a 10% commission rate and this remains the same regardless of the retail price they set. If your item is offered in a promotion, you will get 10% of the sale price.
You can set your own profit margin in the Wall Art category. By default, it is set at 10% but you can change it. All the wall art items will change to the new percentage while the rest will remain at 10%
You’ll see a ‘Pricing’ link at the top on the left-hand side of your Artists Studio page.
A new window with a table of your listings in the wall art category will appear. Look for the markup column along the first row. You will see the percentage boxes where you can enter your preferred percentage. When you have finished, click ‘Submit Changes’.
How Do You Price Art Prints?
This is not a science, there are no rules for pricing art, but there are helpful guidelines. Your own prices will be governed by market forces, so you won’t get away with a wild guess.
I suggest that when in doubt, start low. Don’t give things away but there is psychology at play. No one minds when your prices creep up. They are more concerned when they go down.
Returning customers might notice the price hike but as long as it’s not too extreme, they will still buy, and what’s more, they’ll be thankful they bought when they were cheaper. If, on the other hand, they return and your prices have sunk, they will feel cheated that they overpaid.
Do some basic research. Go back to the main page and click on ‘Wall Art’ in the top menu, and click on ‘Art Print’ in the dropdown menu.
Scroll down the page and look for the type of art that is similar to your own. You’ll see the average prices and have a rough idea of what to charge. Remember that new sellers will have a slow start and it will take a long time before you get meaningful sales. Price at the lower end and be patient.
Collections on Society6
When you have a few products, you can add them to collections. This will make it easier for customers to find your range of products.
You would typically sort them by design style, color, or type of product, but it could be by medium or subject matter. It’s up to you how you present your collections. You can make your collections public when you have at least three items available.
You can access your collections in two ways. You can go to your storefront and click the ‘Collections’ link beneath your bio, or you can click your profile at the top right and tap ‘my collections’ from the dropdown menu.
To create a new collection, look to the top right of the tiles, above the bold dividing line, and click the ‘New Collection’ link.
In the popup window enter the collection name in 60 characters or less, and enter the description below in 90 characters or less. Then hit the ‘Create Collection’ button. Go back to your shop to select the products you want to add to your collection.
Choose a product and under the ‘Add to Cart’ button, you’ll see an ‘Add to Collection’ tab. Your collection names will appear in the dropdown menu. You can add your product to more than one collection if you wish.
Promoting Your Products on Society6
To get as much traffic as possible, to your shop, you will need to promote your products on your social media platforms and/or your website. Society6 will provide the photos.
To grab the product images, go to your profile and choose ‘Manage My Post’ in the dropdown menu. From the ‘My Artwork’ tab, choose a product and at the bottom, you will see ‘View and Edit Products’. When you click it you’ll see a row of items with the same design.
Choose the one you want to view and save the image to your computer.
You can publish these images on your social media and link back, or do the same on your website
Society6 also provides free mockups for your products. You can download a zip file on their website .
Alternatively, you can try:
Promote discounts and free shipping deals when they appear. If you have an email list, you can send offers to your target audience. This is a great way to get instant trade. Remember to include a direct link to your products. Make things as easy as possible.
Take note of seasonal trends and promote appropriate images prior to holidays and events. For instance, you are more likely to sell T-shirts and towels in the summer, and duvets and wrapping paper in the winter.
If you are serious about promotion there are others ways to direct people to your store. You can join forums, engage and help others. Share your knowledge and drop in your links occasionally. Don’t hype and spam heavily because it will not work.
- Facebook Groups
- Quora
- Reddit (stricter about links)
Join Medium and write articles about your type of art and things related to your products. Decide who you are trying to attract and target your posts to the people that might want your products.
I will save you some time and wasted energy, artists don’t buy art. Most buyers will be female and interested in home decor or gifts.
Using an authority site like Medium to send traffic to your listings will boost your Society6 rankings, and as Medium posts are fairly easy to rank on Google, it has a reasonable chance to generate traffic.
You must write about subjects that have some search volume and without major competition. The easiest way to do that, without spending money on yet more marketing tools, is to ask questions related to your art and products on Google.
If you find forums on the first page, they will be easy questions to answer, and rank your article on page one.
Don’t just answer the question with a Medium post. Answer the question in the forums too and link them to your post for a longer answer. This will give you an instant presence on page one and signal to Google that your answer has authority.
Your post will have affiliate links back to your Society6 store.
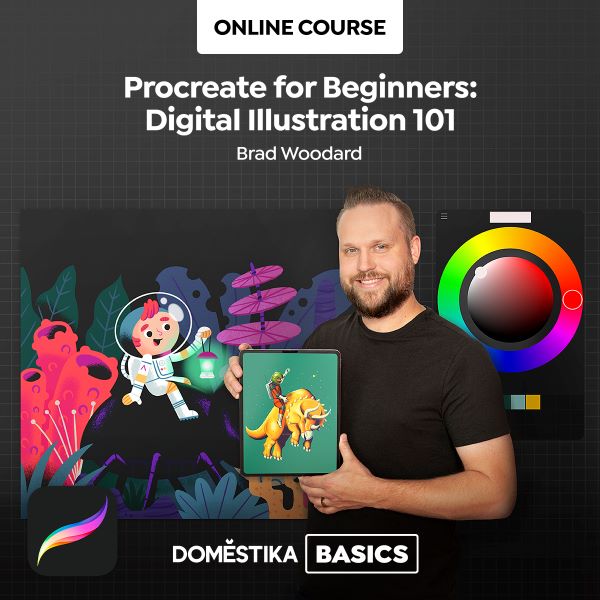
I found this course on Domestika that will help you

You can find more questions on Google by noting the ‘People as ask’ section that usually appears. You can surf this way until you find the best questions to answer. You will also find more ideas when you type your query into the search bar. Autocomplete will produce more ideas.
You can also check on Google Trends. If you enter a phrase or question and you get data, you can be sure there are plenty of people searching for that term. Double check with a real Google search and see what the competition is.
Forget about answering the questions dominated by giant sites on Google results. You are looking for low-hanging fruit with low to medium competition.
Your search will tell you what to do. If blogs dominate your search, write a blog, if YouTube videos win, you must make a video.
You can do the same thing by blogging from your own website but there is an obstacle. A new site will take many months to get picked up by Google and then only for the lowest competition keywords. Blogging is not an instant fix.
You can be an affiliate for Soiciety6. Read this: 45 Affiliate Programs for Artists: Mega Guide (2023)
Another way to get an instant boost in traffic is to publish a press release. The better sites will charge you for the privilege but it’s almost guaranteed to drive traffic to your store. They syndicate your press release to news agencies.
- Prweb (Paid)
- Online PR News (Freemium)
- Prlog (Free)
You will only need to write about 500 words and you can outsource the job on Fiverr you don’t feel confident. Think of it as advertising with super powerful backlinks.
There is much more info on Keyword research in this post: Is Redbubble Worth it? Pros and Cons For Artists and Designers
Become an Affiliate for Society6
Another way of earning extra money from Society6 is to join their affiliate program and send customers to your store via your own dedicated affiliate links and earn another 10% commission.
To sign up, click on any design and scroll down, and near the bottom, you will see ‘Share this and get paid with our affiliate program’.
Click on the link and it will take you to the landing page where you can read about the program. Click on the ‘Apply Now’ button
Fill out the form and check the terms and conditions box and click the ‘Submit’ button.
Wait for approval and when you are accepted a personal link will appear under each product at the bottom of the page. You can copy it and use it to promote your item.
You can check your payments, go to your profile at the top right and click ‘Earnings’ in the dropdown. Click in the dropdown box next to ‘payment type’ on the top right and choose ‘affiliate’. Your record will appear.
Is Society6 Worth it for Artists?
There have been some big changes in this print-on-demand space and Society6 is following along with the announcement of a new price tiering model and shipping fees.
It should not come as a big surprise that costs have gone up, it’s more important how those costs are applied and Society6 seems to have upset some of their customers, both creators and customers.
Look at this screenshot from Trustpilot. It’s not so good.

When you look up Society6.com on Trustpilot a lot of people are unhappy, 54% rated them as bad, and 10% rated them as poor, and only 26% are very happy. There are many complaints concerning quality and customer service. The newest complaints involve slow loading times and changes in the algorithm. Read them here.
Take that as you will.
This is a screenshot from one of the disgruntled sellers on Society6.

I always bang on about it, but this confirms my belief that you should never put all your eggs in one basket. You cannot rely on these platforms. You can’t even rely on Google now AI is set to change the way we search the web.
Society6 is an established print-on-demand service and potentially, it’s a good way to earn extra money. If you are a digital artist or graphic designer this platform is viable.
Society6, along with other print-on-demand websites, is more suited to simple designs with bold graphics that can be produced quickly and are easily edited and scaled. The complainant above has highlighted that.
I’m tempted to suggest that disposable designs will do best. That sounds harsh, and I don’t mean to sound elitist in any way, but it is a fact that the best designers will have instant copycats to contend with, as soon as their creations start to sell.
And now Ai content is flooding the market.
You can’t be precious about your art because you can’t really protect it.
That’s a big drawback for many independent artists. How can you create unique products and a cohesive brand, when fellow ‘artists’ are so ‘inspired’ by your designs, that they do something similar? In other words, parasite your hard work.
If you have a relaxed and pragmatic attitude, and you can accept POD marketplaces for what they are, you’ll be fine. The most prolific artists can make a good income. The best sellers, and cleverest creators, can make a good income if they spread their bets. over several platforms.
If you consider yourself to be a fine artist, I’m not sure if this is the best platform for you. Not because there are not enough products for your artwork, but because of the quality control or lack of it. If you sell your art you want to know that the customer will be happy with the purchase.
The last thing you want are returns and refunds.
Sell Your Art on Society6: Final Thoughts
In conclusion, overall Society6 is a decent platform and a good prospect for some types of art, it’s easy to set up, easy to use, and risk-free. It’s a viable side hustle, and great for beginners.
Personally, I would not post a piece of art that I care deeply about, but that’s just me, it’s for individual artists to decide for themselves where they draw the line with their art. No pun intended.
If you just want to set up a passive income stream without too much effort Society6 is one way of doing it. Combine this with Redbubble, Cafepress, Zazzle, and all the rest, and you can make some decent money.
Diversify your income streams and sell your art offline from a market stall. I’ll show you how step-by-step
If You Want to Sell Your Art
Check this out!
Psst…it’s only $12.99!
If you found this article useful, check these out too:
- Is Domestika Worth It? The Pros and Cons for Artists and Designers
- This is How Artists Make Passive Income
- Is Printful Worth it? Print on Demand Review (2023)
- 25 Platforms for Artists to Sell Their Art Online and Make Money
- 19 Ways to Make Money as an Artist Online and Off: No Fluff!
- Are Proko Courses Worth It? A Review – Pros and Cons
- Social Media For Artists: The Best 13 Platforms for Creatives
- Where to Print Art Prints From Etsy (Downloads / Printables)
- Is The Procreate App Worth it For Beginners? Get the Facts
- Are Online Drawing Courses Worth it? I Chose 5 of The Best For You!
Pin For Later


Hi, I’m Kevin Hayler
I’ve been selling my wildlife art and traveling the world for over 20 years, and if that sounds too good to be true, I’ve done it all without social media, art school, or galleries!
I can show you how to do it. You’ll find a wealth of info on my site, about selling art, drawing tips, lifestyle, reviews, travel, my portfolio, and more. Enjoy