

When you’re putting together your first drawing kit, it’s incredibly tempting to walk into an art store and buy one of everything, a fancy sketchbook, dozens of pencils, even a drawing board.
But here’s the truth, most of that stuff ends up gathering dust.
In this post, I’m going to walk you through the small handful of art tools that actually matter when you’re learning to draw, why each one earns its place in your kit, and how starting with less can actually make you a better artist, without draining your wallet in the process.
Disclaimer: When you buy something via my affiliate links I earn from qualifying purchases and sometimes earn a commission, at no extra cost to you. I am an Amazon Associate among others. I only recommend trusted sites.
Choosing the Right Drawing Pencils
The first thing to get right is your pencils, and this is where a lot of beginners fall into a trap.
It feels sensible to grab the cheapest set you can find, but that’s actually a false economy.
Bargain pencils often have gritty, inconsistent graphite that breaks constantly, with an unreliable tonal range, and honestly they make the learning process more frustrating than it needs to be.
Instead, stick to an established, trusted brand, names like:
They have been refining their graphite formulas for decades. You’ll pay a little more upfront, but you get pencils that sharpen cleanly, layer smoothly, and behave the way you expect, every time.
One thing that really matters here is consistency of tonal value. With cheaper brands, a 2B pencil in one box might not match the darkness of a 2B in the next box you buy, the grading is often unreliable. Don’t buy cheap Chinese rubbish.
Confused? Read These:
With an established brand, a 2B will always give you the same tone, every single time. That consistency is what lets you trust your tools completely, so you can focus on your drawing technique instead of second-guessing whether it’s your hand or your pencil letting you down.
Following on from that, here’s the other crucial rule, don’t mix brands. A 2B in Derwent is not the same tonal value as a 2B in Staedtler, each brand sets its own range, and there’s no universal standard across them.

So my advice is this, pick one brand that’s easily available in your area, ideally somewhere you can buy individual pencils to top up your set rather than being forced to buy a whole tin every time you need one more grade.
Then stick with that brand and really get to know it. Once you’re familiar with it, picking up a pencil means you know exactly the tone you’re going to get, no surprises, no guesswork.
One area where beginners waste a lot of money is buying a full tin of pencils, ranging all the way from 9H to 9B, assuming they’ll need the whole spread.

In reality, you’ll only ever reach for about half a dozen of those grades. My advice is to buy a small range instead, from 4H at the lightest, up to 3B as the darkest.
You really don’t need to go any darker than 3B, darker grades don’t give you a richer black, it just creates an annoying shine on the graphite that can ruin your picture.
Tip: This ties into another common beginner mistake, pressing hard on the pencil to try to get a darker tone. Almost everyone does this when they’re starting out, but it’s the wrong instinct.
It’s always better to build up your darks gradually through layers, rather than pressing hard in one go, you’ll get richer, more controlled results, and you’ll avoid that shine altogether.

Likewise, go any harder than 4H, or press too hard with an ‘H’ pencil and you risk scoring the paper as you draw. As a beginner, you should avoid this while you’re learning.
Your Drawing Paper
The next essential is your drawing paper, and the same logic applies here as with pencils, choose a reliable brand, because you need the texture to be consistent.
When you’re drawing, you want to know exactly what kind of mark you’re going to get, and if you buy a cheap, unbranded pad, there’s no guarantee you’ll be able to reproduce that same result next time you buy a new pad.
Cheaper brands don’t keep to rigid manufacturing standards, whereas an established brand keeps its process consistent, pad after pad.
Read The Guide Here: What is The Best Paper for Graphite Pencil Drawing?
Thickness matters too. If your paper is too thin, you’ll struggle to draw without damaging the surface or watching it crinkle under your pencil, so look for a reasonable weight. I wouldn’t want to draw on paper below 80gsm.
You’ll also want to think about texture, whether you prefer something grainier or smoother. My advice for beginners is to keep it simple with a cartridge paper, you don’t need to go anywhere near the top of the range.


I personally use a Daler-Rowney pad, it’s professional quality, acid-free so it won’t deteriorate over time.
It has a fine tooth, just enough grain to help you achieve good, rich darks, without being completely smooth like Bristol board, which is really better suited to illustrators and fine pen work.
One last tip, stick to white paper when you’re starting out, avoid the temptation of tinted sheets. In my experience tinted papers can be unreliable,
I’ve had cases where erasing a mark also rubbed away the tint underneath it, which is the last thing you want while you’re learning.
In terms of format, I’d recommend working in A3, it’s a comfortable size to work with. Go for a pad with gummed binding rather than a ring binder, tearing pages out of a ring-bound pad can cause accidents and creases, whereas a gummed pad lets you peel each sheet away gently and cleanly.
If the Worst Happens: 9 Ways to Repair Drawing Paper and Rescue Your Artwork
You’ll also want a genuinely stiff backing board. This matters most if you like sketching outdoors, you need something firm to lean on and draw against.
Cheap pads often have a thin, flimsy layer of cardboard at the back, so instead of a solid drawing surface, it feels more like holding a loose pile of paper.

Pencil Erasers
The very minimum you need is a kneaded eraser, most people are familiar with these these days, they’re the putty-like ones you can knead into a point.
You can gently rub the paper surface, and they lift the graphite away without damaging the paper underneath.

They’re genuinely effective, though in my experience they work best over broader areas of a drawing, rather than when you need to lift very small, precise spots.
Another advantage is that they’re easily cleanable, you simply knead them again and remould them into a fresh, clean shape whenever they get dirty.
Read My Advice Here: Best Erasers for Drawing: The 9 Eraser Types for Artists
Alongside your kneaded eraser, it’s worth picking up some Blu Tack too, it costs next to nothing, so there’s really no reason not to.
Used as a dabbing tool, it has surprising lifting power thanks to its slight tackiness, and it lets you lift extremely tiny, precise areas of graphite. If you work in a detailed style, Blu Tack actually gives you more accurate, controlled lifting than a kneaded eraser can manage.
Finally, I’d also recommend an eraser pen, I personally use a Tombow Mono Zero.

These are brilliant for very fine, precise white lines, think individual strands of hair as highlights, something you simply cannot achieve with a kneaded eraser, no matter how well you shape it.
The nib can be sharpened down to a genuinely fine edge, letting you pull out thin, crisp lines with real control.
They cost very little, so it’s well worth adding one to your drawing kit.
Your Sharpener
The sharpener is an easy one, there’s no need to buy anything fancy here. A simple plastic pencil sharpener will do the job just fine.
The only thing to watch for is the blade going blunt, don’t try to struggle on with a blunt sharpener, all it does is snap the lead and tear at the wood instead of giving you a clean cut, it’s a complete waste of time and it’ll ruin your pencils.
When that happens, just buy another one, they cost next to nothing.
As an alternative, some artists prefer to sharpen with a sharp craft knife instead, making long, shallow cuts by hand.
It’s not something I do regularly myself, but it does give you a longer exposed lead, which is handy if your technique involves using the pencil on its side to get broader strokes. Either way, all you really need is a simple blade to keep your pencil sharp.
If you tend to draw very fine detail, it’s also worth keeping a sheet of emery paper on hand.
Rather than reaching for the sharpener every time your point dulls slightly, you can just drag the tip across the emery paper, twisting the pencil as you go, and it restores a nice sharp point in seconds.
It’s a small addition to your drawing equipment, but a handy one if precision matters to your style.
A Piece of Scrap Paper
One last tip that’s easy to overlook, keep a spare piece of scrap paper under your drawing hand as you work.
So many beginners rest their hand directly on the drawing, and then wonder why the finished piece looks dull or smudged, it’s simply from leaning on it as you go.
There’s nothing more frustrating than spending hours on a piece, only to realise at the end that you’ve smudged it through nothing more than a bad habit.
Get into the habit of placing a sheet of scrap paper down first, the key is that the paper itself must stay still, your hand simply glides over the top of it. That one small habit will save you from ruining work you’ve put real time into.
What You Don’t Need
There’s also a handful of art equipment that gets pushed on beginners that really isn’t necessary when you’re starting out.
You don’t need a drawing board or an easel, a drawing pad with a stiff backing does the job just fine on its own. And you don’t need fixative either.
Graphite pencil drawing doesn’t actually deteriorate on its own, it’ll stay exactly as you drew it. The real key is just protecting it properly, if it’s a finished piece, keep it in a frame, or behind glass.
Related Posts:
- How to Protect and Preserve Your Pencil Drawings Properly
- How to Store Drawings Safely: The Ultimate Guide
If it’s still in your pad, a sheet of glassine paper laid over the top works well enough to keep it safe.
The trouble with fixative is that spraying a layer over your work can actually change the tonal values, sometimes it darkens or alters a drawing you were genuinely happy with, and ends up spoiling it.
So be careful, if you do decide to fix a piece you love, it’s worth weighing that risk, and framing it or slipping it into a plastic sleeve with glassine paper is often the safer choice.
Minimal Drawing Kit: Final Thoughts
So, to sum up, if you’re heading out to buy your very first drawing kit before starting a class, here’s your art supplies list.
A small range of pencils from one trusted brand, 4H through to 3B. A pad of reliable, acid-free, white cartridge paper, ideally A3 with a gummed binding and a stiff back. A kneaded eraser, plus a bit of Blue Tack for fine detail lifting. A simple pencil sharpener. And a scrap sheet of paper to rest your hand on as you work.
Everything beyond that is genuinely helpful once you’re a bit further along, but not essential when you’re just starting out.
Get these art essentials right, learn to trust them completely, and you’ll be amazed how far a small, well-chosen kit can take you.
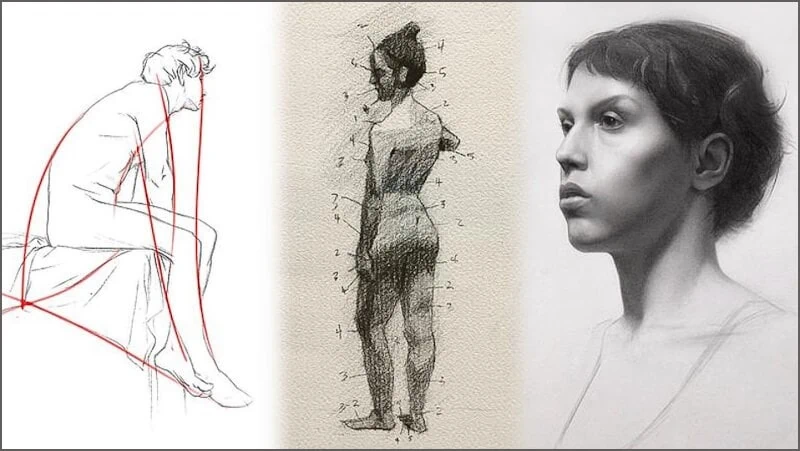
If you need more help with drawing, then I urge you to check out
Dorian Iten on Proko. His course is reasonably priced and inspiring
A Few More Posts That Will Help:
- Is Drawing a Grid Cheating? – Do Real Artists Use Grids?
- The Basic Skills of Drawing: Learn to Draw For Beginners
- Can You Draw With Mechanical Pencils? YES! Here’s How
- Are Drawing Books Worth It? Can You Learn From Books?
- 32 Drawing Mistakes and Bad Habits Artists Must Avoid
- Drawing from Photos: The Hidden Traps
- 5 Drawing Tools You Need For Blending Pencil
- 9 Pencil Shading Techniques and Tips for Beginners
PIN THIS


Hi, I’m Kevin Hayler
I’ve been selling my wildlife art and traveling the world for over 20 years, and if that sounds too good to be true, I’ve done it all without social media, art school, or galleries!
I can show you how to do it. You’ll find a wealth of info on my site, about selling art, drawing tips, lifestyle, reviews, travel, my portfolio, and more. Enjoy