

I didn’t set out to become a hyperrealist. Honestly, my detailed art happened by accident.
Early on in my commercial art career, insane detail wasn’t the goal. I was just drawing.
The turning point came while selling my art in a street market. I set up an easel, and draw live in front of people, to attract people.
You’ll Like This: How to Sell Art on The Street: By a Street Artist
And here’s the thing. The more insane the detail I put in, the more people stopped and stared. It became my hook, to get attension.
That stall attracted all sorts of people, fascinated by the drawing process. It’s not something you see every day.
But the real bonus was the kids. Children would come up and be absolutely amazed that someone could draw this way. And they’d drag their parents over to have a look.

Youngsters Loved This one
You’ll Appreciate These: 7 Hyper Realistic Drawings: Animals That Look Like Photos
That interaction, chatting with the kids, entertaining the crowd while I worked, did wonders for my print sales. Especially since I kept my prints priced low enough for anyone to buy on impulse.
So that’s where all this comes from. Years of drawing in public, learning what actually works, on the page and in the marketplace.
Here’s what I’ve learned.
Disclaimer: When you buy something via my affiliate links I earn from qualifying purchases and sometimes earn a commission, at no extra cost to you. I am an Amazon Associate among others. I only recommend trusted sites.
My Drawing Process For Adding Detail
First things first, I base all my drawings on my own references. I want everything unique to me, and it keeps me clear of any copyright issues.
Taking the photographs I base a drawing on is part of the fun, honestly, part of the adventure of the whole thing.
Read This: Where to Find Wildlife Subjects to Draw, Paint, and Photograph
It means every piece carries my own angle, my own experience, my own story. That’s not just good for how I feel about the work, it’s a genuine selling point too, nobody else has that exact photo or that exact story behind it.
Without wishing to sound pretentious, it’s the art behind the craft.
Directly Related: Is Hyperrealism Art or a Skill? What’s the Point?
I don’t treat my references as gospel, though. I can visualise the finished composition even from a pretty poor photo, as long as it’s got the core substance I need, I can progress.
From there, I play around. I’ll add things, take things away, or combine two images that wouldn’t make a strong drawing on their own. I can merge two or more images into one composition that tells a completely new story.
More info:
If part of a photo is out of focus or missing detail altogether, I can sharpen it up during the drawing process itself, or find a similar reference online just to understand the anatomy or structure of what’s missing. .
I’ll bring the separate image files into a photo editor to fine tune how everything sits together. Back in the day I did this by making photocopies of each photo and literally cutting and pasting these separate elements together. Not now. Time moves on.

When Im happy with my composition I’ll save the file and print it out as a black and white copy at the exact size I intend to draw it.
Personally I like to draw on an A3 size paper and this is perfect for a print out.
I always draw size for size rather than scaling up from something small. The brain copes far better working at a one to one scale than trying to translate a small reference into a much larger drawing.
This Will Help: How to Scale Up a Drawing in 4 Easy Ways
Next I draw a very accurate grid over the top of the disposable copy, then mark out the same scale grid on my actual drawing paper, before I map anything out properly. The grid size is optional. If you lack confidence use a small grid.
With the grid down, I start placing the main features of the composition, lightly at first, so I can correct anything that’s off before it becomes a real problem.
Read About Using a Grid Here: Is Drawing a Grid Cheating? – Do Real Artists Use Grids?
The focal point matters more than anything else, and in a portrait that’s almost always the eyes. If you don’t get the eyes right, you haven’t really got a drawing, everything else can be technically brilliant and it still won’t work.
You can afford small errors out towards the edges of a composition, but the core features need to be placed exactly right before any real detail work begins. At this stage, it’s still just an outline, getting the bones of the drawing correct before you even think about shading.
With the outline and the placement of the eyes confirmed, it’s time for the part I find genuinely scary, the detail itself. Getting the eyes right is absolutely crucial to the success of the whole piece.


I work one square of the grid at a time, building up gradually through small wins. Once the eyes are drawn and they’re right, that gives me the confidence to invest real time and effort into expanding out into the rest of the picture.
If something goes wrong at this stage, the eyes come out crossed, I’ve pressed too hard, or I’ve damaged the paper trying to correct it, it’s not a disaster. I can start again before I’ve sunk weeks into the piece. That’s why the eyes come first, get them right before anything else.
From there, I just build outward from the eyes, expanding the drawing gradually. Technically, this probably isn’t the textbook approach, most would say you should nail down the overall tonal values across the whole image first before committing to detail.
This Might Help: How to Draw a Realistic Eye
But that’s not how I work, and I’m not sure I’d necessarily recommend it, it’s simply how my drawing process has developed over time.
Once I’m buoyed up by getting the eyes right, I expand outward from there, working through the grid one square at a time. In the trickier areas, that might mean spending the best part of a day on just a few square centimetres.
Throughout all of this, I’m constantly referencing the photo through the loupe, that’s how I keep locked onto one tiny area at a time and see the detail within the detail.
But this method has a real cost. Focusing this intensely on one small section means you can easily overdevelop it while the neighbouring area ends up a touch less refined, or simply a different tone. The two sections don’t always marry up naturally as you go.
That’s arguably why the more textbook approach, working the broader picture first and refining everywhere at once, produces a more even result.
My way leaves things a little disjointed along the seams. So at the end, I always have to go back over the whole piece, softening those joins until the tone and style feel consistent and the whole thing reads as one seamless drawing, not a patchwork of brilliant little squares.
That’s really the heart of my process, reference, grid, eyes first, then expand outward square by square, tidying the seams at the end. But none of that works without the right kit in hand.
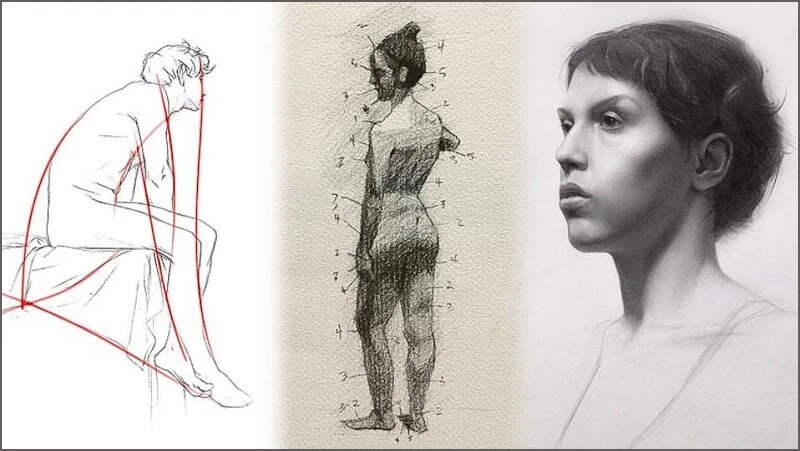
If you need help with drawing, then I urge you to check out
Dorian Iten on Proko. His course is reasonably priced and inspiring
My Precision Drawing Kit
The Pencils
I use standard branded (Derwent) drawing pencils in the H range for the lightest, hardest lines. For a darker mark, I use Pentel mechanical pencils in the 0.3mm B range, since they hold a super fine point without needing constant sharpening.

Read These:
- Best Drawing Pencils For Beginners
- Best Mechanical Drawing Pencils For Artists
- What Do Pencil Numbers Mean? Pencil Grades Explained + Charts

The Erasers
Erasers matter just as much as pencils. Maybe more than people think.
More Detail:
- Best Erasers for Drawing: The 9 Eraser Types for Artists
- How This Drawing Hack Using Erasers Transformed My Art
A battery powered eraser gives you a tiny spinning tip. It’s perfect for precise work in really tight spots.

A pen style eraser handles the everyday fine corrections. Slice the tip off with a craft knife and you get an ultra fine edge, basically a drawing tool in reverse.
I also swear by blue tack. It lifts graphite with more precision than a standard kneadable eraser ever will.
Keeping your pencil tip sharp isn’t a one off job. It’s constant maintenance.
You’ll Love This: How to Draw White Lines in a Pencil Drawing: Do This…
The Sharpeners
I keep a scrap of emery paper handy and run the tip across it every few strokes. That keeps it needle sharp all the way through a piece, rather than letting it slowly go blunt.
I keep a craft knife handy.
Magnifying Glass: 5x Linen Tester
I Blu Tack my reference photo up next to the drawing on the board for a quick side by side comparison. Then I use a magnifying loupe, often called a ‘linen tester’, at five times magnification, to study the fine detail up close. (TIP: 10x is too strong)
I got this hack watching commercial artists draw in Thailand.

For reference, I stick to physical printed photographs, not a screen. That’s mostly because I work outside, and a screen just isn’t practical out there, but I find I’m able to focus on detail much more when I view it through a hand held lens.
A Word About Temperament
There’s the one ingredient you can’t buy, and that’s patience.
A single study can take days. Sometimes weeks. Only a certain type of person can invest their time on such slow progress.
So how do you actually get through something you know is going to take a painfully long time? For me, the answer is in short bursts, not one long slog.
I work in sessions of about twenty to thirty minutes, then I step back and take a break.
Trying to push through in one huge sitting just doesn’t work, you burn out, you get impatient, and you lose sight of the picture, you get lost in the detail and stop seeing your errors.
Instead, I build on small wins. Some days I might only finish a few centimetres, but if that section is done properly, that’s a genuine achievement in itself. I come back to it the next day, with confidence, and carry on.
Little and often is the way it works.
The Commercial Reality Of Highly Detailed Art
Here’s where it gets complicated.
Insane detail is a brilliant hook. It grabs attention. It builds reputation. It wins you customers who are drawn in by watching real skill in action.
That part’s genuinely great for business.
But here’s the honest truth. All those extra hours don’t translate into a price premium.
Buyers don’t pay more just because a piece took three weeks instead of three days. It’s counterintuitive, but that’s not how people buy art.
What actually drives the sale is the physical size, the medium, and the subject matter. These are the dominant factorst, far more than the endless hours you poured into the work.
Time is not appreciated. It’s very hard to get a descent return.
That means the only realistic way to make your time back on a highly detailed original art is through prints.
Useful Link: Selling Art Prints For Beginners: The Plain Truth
And even that carries risk.
There’s no guarantee a talented study that took weeks to draw, will resonate with buyers.
Read These to Lessen The Risk:
- 12 Wildlife Art Bestsellers (Use These Subjects to Make Money)
- What Size Art Sells Best? Prints and Frame Sizes
- What Kind of Art Sells Best? The Popular Subjects Revealed
- 7 Bird Art Bestsellers: Best Wall Art Selling Guide
- 9 Farm Animal Art Bestsellers: A Selling Guide for Artists
You can end up with something that earns nothing but praise, and no sales. It’s a calculated risk, every single time.
There’s something else worth mentioning.
Monochrome work carries the same psychological baggage as black and white film or television. It gets quietly filed away as lesser, regardless of the skill on display.
Talent alone doesn’t buy you out of that. The medium puts a ceiling on price that a coloured medium like oil painting simply doesn’t have.
It sucks, but that’s just the way it is.

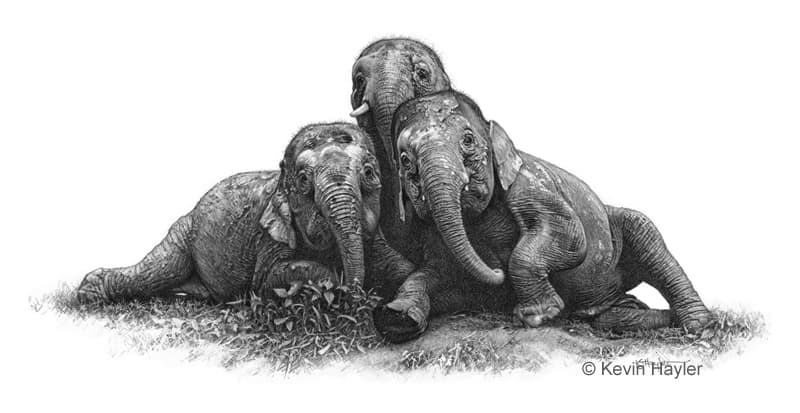
When in Doubt, Draw Another Elephant!
That leads me on to the next commercial aspect, the printing process.
What I’ve Learned About Printing Art
When I started printing.back in the 90s, I used offset litho printing to produce runs in volume.
Printing black and white this way costs roughly a quarter of what full color pricess. A real advantage.
The catch is accurate tonal reproduction is genuinely difficult to pull off. You need a properly skilled printer to do your work justice.
Not easy. All printers claim they can do the work. In fact, only specialists can reproduce monochrome accurately.
These days, most artists use Giclee prints.
Read these:
- How to Make Art Prints at Home
- What Are Limited Edition Prints? 12 Things You’ve Got to Know
- How to Sign Art Prints
- Pros and Cons of Open Edition Prints
I also have experience with giclée printing. In theory, it gives more consistency, but it’s not maintenance free.
Equipment needs to be properly calibrated, and switching between machines or print houses can give you a noticeably different result from the exact same scan.
The upside of giclée is you’re not committing to a big upfront outlay. You can do genuinely short runs.
The downside is the unit cost is significantly higher than offset litho. And that cost gets passed straight to the customer.
In my experience, the buying public is very price conscious. That premium isn’t always an easy sell, especially for open edition black and white prints.

Listen, printing is a whole article in itself: How to Make Prints of Your Art: A Complete Printing Guide
How to Draw Detailed Art: Final Thoughts
So there you have it, everything from that first market stall sketch to the grid, the eyes, the loupe, the endless small sessions, right through to the harder truths about prints and pricing.
And I do make money doing it. I’m not just drawing for the pure pleasure of it, I sell my prints, and I’ve built a genuine living from this.
Yes, some prints sell slower than others, but they still add to my portfolio, and as every retailer will know, you have to have a display to sell anything, and only a few prints will sell consistently well.
Bear in mind, everything finds a buyer, eventually.
Honestly, I do things this way because I love the lifestyle it’s given me.
And if you want the full picture of how to actually turn this kind of work into a living, not just praise, but real income, I cover it all in my guide book.
I’ll show you how to make a living selling your art. Everything I’ve touched on here is just the surface, the book goes into the detail of how to build an art business from scratch. Not to be famous, but to make enough money to have a good life.

These posts are all related:
- How to Draw Texture in Pencil: 7 Tips for Realistic Results
- How to Draw Water in Pencil: Drawing Water Step by Step
- How to Draw Realistic Shadows in Pencil: Light and Shade
- 20 Art Fair Strategies That Sell Art
- 8 Selling Tips for Shy Artists
- How to Price Art Commissions: Your Art Pricing Guide
- How to Present Your Art Prints For Sale in a Market
- How to Draw Realistically: 11 Realistic Drawing Tips
- How to Find Art Commissions: A Mega Selling Guide
PIN THIS


Hi, I’m Kevin Hayler
I’ve been selling my wildlife art and traveling the world for over 20 years, and if that sounds too good to be true, I’ve done it all without social media, art school, or galleries!
I can show you how to do it. You’ll find a wealth of info on my site, about selling art, drawing tips, lifestyle, reviews, travel, my portfolio, and more. Enjoy