
Kevin Hayler: Professional Wildlife artist, author, and traveler.
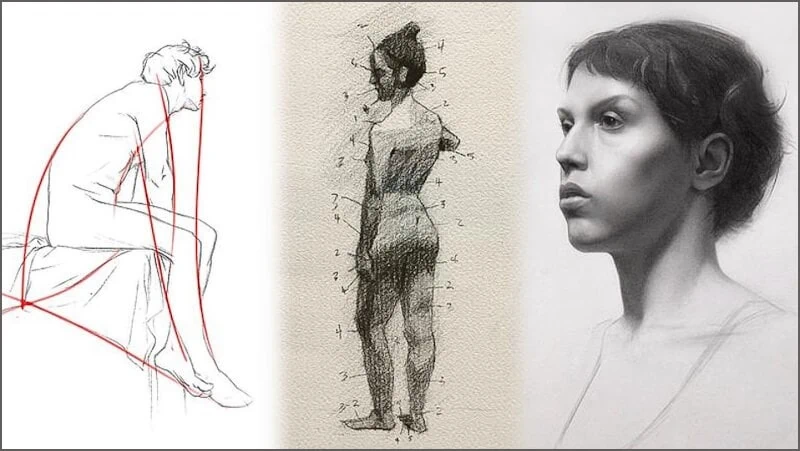
When I’m talking to a novice, I’m often asked where I begin and the first thing I tend to say is ‘draw a quick outline’ but that’s not the whole truth.
As an artist, you have to plan and compose your art before you can make a start. In that sense, you start with an idea. I’ll break down my creative process for you. Planning and composing a work of art involves the following steps:
Decide on a niche, source your subject, sketch and take photos. Crop images, flip them, or make montages. Compose using the rule of thirds, lead lines, values, and focus. When you’re ready, start drawing.
Of course, this is only the general idea. There’s far more to it than a brief summary allows. I’ll explain my methods using my own drawings as examples, so let’s go into more detail.
Disclaimer: When you buy something via my affiliate links I earn from qualifying purchases and sometimes earn a commission, at no extra cost to you. I am an Amazon Associate among others. I only recommend trusted sites.
Find Your Art Niche and Target a Subject
The easiest way to stay focused, plan, and compose your art is to specialize, narrow down, and find a niche. It’s so much easier.
When I painted landscapes for a living I was alert to compositions everywhere. I had an inbuilt radar and I could see a new painting at every turn.
These days my niche is wildlife art in pencil, and again, as far as a piece of art is concerned, I have a one-tracked mind.
I target animals. In truth, it’s not just wildlife, I draw a few domestic animals too, usually because they are so cute that I can’t resist it!

Whatever your passion is, devote your time to one subject. Your aim is to be known for something you do well. Yes, you are pigeonholing yourself, but believe me, people need to know what you are, what you do, and why you do it. If you want an art career it matters.
Being a Jack-of-all-trades will get you nowhere.
Plan and Compose Your Art Using Your Own Reference Photos
As a professional artist, time is money and I can’t afford the romance of sketching everything, sadly it takes too much time. I use a camera and when inspiration strikes and I see an interesting composition, I take photos.
Most commercial artists are faced with this conundrum, it goes something like this: You’re too busy making art, to make art.
Only you can judge where your personal red line is drawn. If making a quick sketch from life is intrinsic to your style, go for it, but take photos as a backup. You can always continue back in the studio.
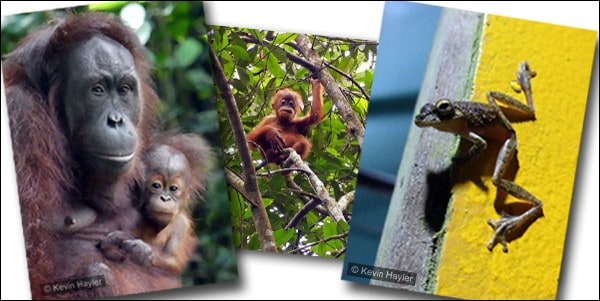
Where you find your reference photos, is to a large extent, going to be determined by your chosen subject matter. As my niche is animal life I can make it my mission to seek out wildlife in any number of ways:
- I can go for a stroll in the countryside,
- A nature reserve,
- The local park,
- Visit a zoo,
- A rescue center,
- A bird table
- Or go traveling!
Anywhere there is life, there are subjects and compositions. That’s why I don’t confine myself to field trips, I always have a camera with me.
In this day and age, with smartphones being so ubiquitous, I always have something to hand. You never know when something will appear from nowhere.
I remember the day I saw a sparrowhawk take a pigeon right in front of me in the center of town. It refused to let go and stayed there, only a few feet away. I had no camera that day and I was gutted.
I don’t work from life so I need a camera, but if I did, I would still make sure to photograph the subject and catch the light. The brilliance of a landscape can be a fleeting moment and when it’s gone, it’s gone.
Unless you have an extraordinary memory you’ll lose a potential painting. I need to take photos.
I explore the pros and cons of using your own photos here: Is Drawing From Reference Photos Bad? Are You Cheating?
Get the basics drawn but always record the color and light.
Using Stock Images and Other Sources to Compose Your Art
Many artists choose to do away with seeking their own references altogether and to be honest, I’m perplexed as to know why.
If it’s a commission, or for art practice, I can understand, but you only have to scroll through social media sites such as Facebook groups and Instagram to realize how many professionals rely on outsourcing their images.
I know that it’s hard to get great images but isn’t that the whole point? It’s hard work and others can’t do it. Taking your own reference photos is half the fun and half the talent.
Don’t ‘borrow’ an image.
Asking permission to paint a photograph you don’t own is essential. Do not think that if you use an image the owner will never find out. I’ve had my art stolen quite a few times and you know what? My fans tipped me off. It could come back to haunt you.
It’s safer to get your permission in writing and make sure you are allowed to reproduce the work. You should make a licensing agreement.
This is essential reading: Can You Copy Art and Sell a Painting of a Painting? I Found Out
There’s one loophole. You can copy and paint anything you like but you can’t reproduce that copy. You can sell it privately but you can’t put it on the web, not without the owner’s permission; that’s a copyright breach.
The alternative route is to simply buy a stock photo with all the legal stuff done for you. Your choice of subject matter is huge and you can find fantastic images, and so too can everyone else.
You can paint the images that other people are painting too, but what’s the point?
There is no satisfaction in making art unless it’s your own work.
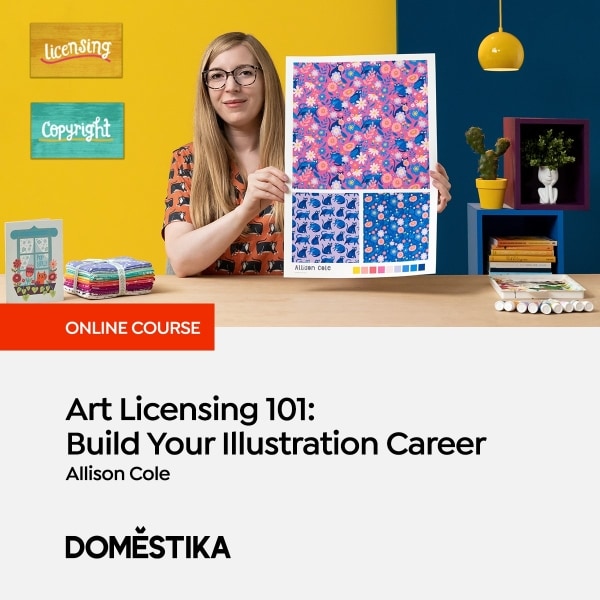
On a closely related theme, if you need some help with licensing your own art and want to know what it’s all about, this is a popular course by
Alison Cole on Domestika
Keep a Digital Scrapbook and Save Composition Ideas
After saying all that, I do use other people’s references. I save the images that inspire me as I browse the web, and I do it for different reasons.
I save images that remind me of photos I’ve previously taken myself. Photos I’ve taken, but which lacked an intangible something. Sometimes I scroll through the Instagram feed and Eureka! I see the composition my photo could’ve been.It gives me new ideas for the future.
Sometimes I save fantastic compositions I’d never have thought of myself. It allows me to save and remember different compositions when I have new projects.
I will also save images for missing details. I might have taken a cracking photo of my own. I have the form, the shadows, and a successful composition, but it’s either out of focus, badly exposed, or missing part of the image altogether. I need references to help me fill in the important details.
And I’ll use references to determine the scale. For example, if I had my own photo of a songbird on a feeder but I wanted to draw it perching on a twig instead, I could find a reference photo on the web, with that exact information, and draw the bird to scale.
Lastly, I keep references for authenticity. Inevitably, I’ll end up with plenty of images of captive animals. If I place them in a natural setting, I want them to look authentic, so I use photo references taken in the wild so I know what the foliage and landscape look like.
Let Yourself Daydream and Compose Your Art
I can’t tell you how important it is to daydream. It’s part of being creative. You’re not wasting time by following a line of thoughts in your head, quite the contrary. Switch off the world around you and let yourself go.
As you can tell, I’m not an ‘arty’ artist, I’m a pragmatist and run my art business in a practical way that suits me. Fine, but the creative juice must flow, ideas have to come from somewhere.
Sometimes people see me lost in thought and ask me if I’m OK. They don’t realize I’m actually WORKING!
The only way to capture those dreams is to record them before you forget and I keep a notebook handy for that purpose. As soon as a good idea pops into my head, I scribble it down or I make thumbnail sketches. If I don’t record it, the idea will be lost in a puff of smoke the moment I’m distracted.

This video breaks down the ‘rules’ nicely. Watch and learn. Then carrty on reading. I mention different things.
Commercial Decisions and Your Choice of Composition
Do you intend to sell your artwork? If so, it’s wise to take a moment to consider what size art works best commercially. Most professional artists will be thinking of making some prints and there are very practical reasons to conform to standard sizes.
It’s easier to sell artwork made to fit standard frame sizes with standard ratios. Forget about artistic integrity for the moment, this is a practical dilemma.
You may know that a panoramic composition will look amazing, but when it comes to framing, it’ll cost a fortune. A less fantastic 4 : 3 ratio might be less creative but much easier to sell.
You’ll find some very useful standard frame and mat (mount) sizes in this guide: What Size Art Sells Best? Frames and Apertures – FREE Chart
Don’t kid yourself that quality is the only factor worth considering when it comes to buying art. The public is only too aware of the costs and inconvenience of bespoke framing. It’s enough to put many customers off, and you’ll lose print sales.
And then there are your own costs. What if you are paying good money to attend art shows? Do you really want to spend a fortune on bespoke framing? Surely not. It’s far better and cheaper to adapt your style and compositions to commercially available frame sizes.
If that is a step too far for you, consider the other option. If you make a series of new work, you can make them all the same size and get a contract framer to send you a batch. That will also work out much cheaper for you.
You can always make the frames yourself. The financial rewards would be higher but the storage, breakages, and transport problems are a nightmare. I know that from experience.
Besides that, have you considered the amount of time it will take? In the long run, you are way better off using your valuable time on the tasks others can’t do for you. Namely making great art.
And then there’s that other bugbear, color schemes.
Like it or not, your art is likely to be chosen or rejected solely on the basis of color coordination. Pictures are decoration and as such, must compliment the buyer’s color scheme.
What!, people aren’t buying art? Yup. They are buying interior decor. Get used to it.
As most people are conservative in their tastes and their living spaces are meant to give them peace, a violent color palette will restrict your market. You have to think about these things.
My work is in graphite. I win in one way because black and white images don’t clash. I lose in another because black and white art has less value. It’s all about compromise and playing the hand you’re dealt with.
How to Construct a Strong Composition
You’ve probably read about the rule of thirds. If not, you’ve doubtless seen the grid that appears in the viewfinder of your camera. The idea is to align the focal point or horizon along the grid lines to find a pleasing balance.

There are other ‘rules’ that you might come across, like the ‘golden ratio’ and ‘golden spiral’. Don’t waste your life reading about them. Over-complicated mathematics.
I have a far simpler way. You look for an ‘L’ shape. and place it off-center. Don’t go too close to the edge on any one side. What’s complicated about that?
Don’t be a slave to rules, you’re not bound by them.
When you scroll to the tiger drawing below you will see the rule of thirds working on the horizontal plane but the focal point is slap-bang in the middle. There are endless variations.
Using Lead Lines to Add Depth To Your Composition
Pleasing compositions take your eye into the picture. Think about roads, pathways, and rivers disappearing into the distance.
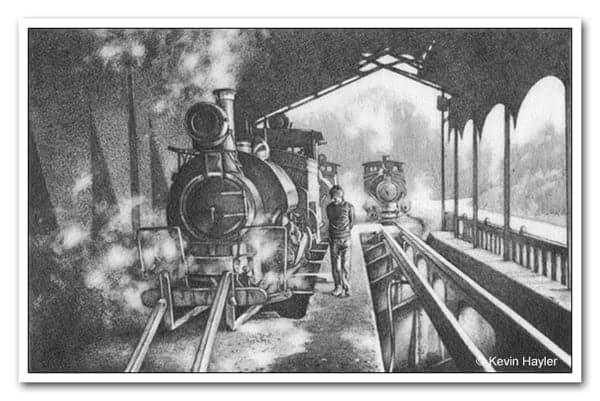
I’ve created the depth in this drawing in two ways. Strong lead lines draw you in and the tones become progressively lighter as your eye is directed towards the far steam engine.
This post explores depth further: How to Create Depth in Your Drawing: 7 Expert Techniques
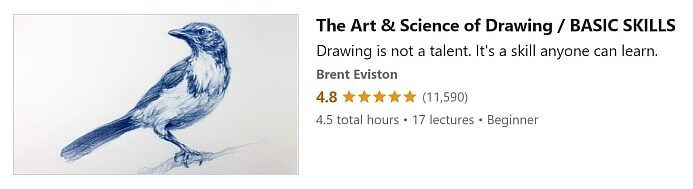
This very popular drawing course by Brent Eviston is on Udemy.
He has over 73,000 students!
Darkest values at the front and lighter at the back. It’s that easy.
Focus can be used in the same way. It de-clutters an image and allows the focal point to pop out. Sometimes, it’s what you leave out, not what you put in.
Change the Focus to Add Depth to Your Composition
This is blatant theft, inspired by photography. We can all appreciate how depth of field can transform a simple photo into something special. Artists and illustrators can contrive the same thing with great effect.
Take a look at this one.

This is an early art piece, drawn way before I used the internet and before I’d ever seen a wild tiger. I visited the London Zoo and took several photos of this Sumatran tiger.
I didn’t use another reference, I guessed how the grass might look if it was out of focus. The intention was to make the focal point sharp and the rest blurry. It was hit and miss and luckily, it worked.
The same principle could be applied to other compositions. There’s no reason why you couldn’t have a sharp central subject and purposefully apply a receding blur to create a depth of field effect.
Another good way of creating a blurred effect on your image is to use the ‘Gaussian Blur’ tool in Photoshop (and most photo editors). Move the slider to the right and your photo will dissolve in front of your eyes. Save the image and copy the bits you need.
Cut and Paste a Montage to Compose Your Art
In this section, I’ll show you how to compose your art by using a pick and mix approach.
I have an array of images. All have elements that I like but nothing works by itself. It makes sense to cherry-pick the good bits and stitch them all together.
Let’s look at the example below.

These are three wild pygmy elephants playing on a riverbank. I took the photos in Borneo but were they really posing like this? No, it’s called artistic license. They all posed like this, but separately. I re-arranged them.

All three elephants were really playing together, the light was coming from the same direction, and the scale was not an issue. All I had to do was tweak the contrast and cut and paste the images together. I removed the color to help me with the tones.
I could’ve drawn just two elephants and saved a ton of time but when it comes to visual impact, odd numbers tend to win. The final piece is immeasurably better as a group of three.
How to Crop an Image For Better Compositions
There is no reason to use all of an image. Selective cropping can produce remarkable results from an otherwise mediocre image.
I can often recognize that something exists within a photo, but I can’t always pinpoint exactly what’s grabbing my attention. As often as not, the photo needs cropping.
Here’s a good example.

You can see how my original photo was lackluster, to say the least. But it had ‘something’ waiting to be discovered.
Even the most uninspiring photos can have potential. Just look at the reference photo I used as the basis for one of my most popular drawings.

I took the photo in Singapore Zoo at feeding time. I stood at the back, behind the kids, and hoped for the best. And this tiny image was the result. Not a classic but the pose was fantastic.
As you can see I cropped the image tight around the jaguar and enlarged it enough to use as a reference. I darkened the background to emphasize the subject and simulated the rocky foreground.
This is typical of my working method. You do not need award-winning photographs!
If all else fails try an extreme close-up. The prize is often in the eyes.
How to Make a Grid For Easy Copying
I like to save my composition to a file and get a real photograph made. If you are comfortable with Photoshop you can also layer a grid over the image. It’s not essential but it is time-saving and accurate.
Read this about scaling your work: How to Scale Up a Drawing in 4 Easy Ways to Save Time
I photocopy my photo and make several enlargements and choose the size I prefer drawing. I always draw on an A3 sheet of paper so I want my drawing to fit within those dimensions.
If you haven’t applied a grid already in Photoshop, grid up your photocopy. It MUST be accurate. This is a tedious task but you must do it properly.
This post includes how to make accurate grids in more detail: Is Drawing a Grid Cheating? – Do Real Artists Use Grids?
N.B. If you need an alternative to Photoshop try . It has a very cheap paid plan and is simple enough to use
Now measure the borderline and use a set square to draw a perfect rectangle on the paper.
Be equally as accurate in marking out the grid on your drawing paper. Now very carefully, draw the lightest grid possible. Don’t press too hard because you will score the paper and make it’s almost impossible to repair
If you need to fix your paper: How to Repair Drawing Paper: 9 Ways to Rescue Your Artwork
You can now draw the outline of your drawing, size for size, and one grid box at a time. Slow but straightforward.
Where Do You Start a New Drawing?
Back to the original question, where do you start? You start by blocking in the main shapes. There are different ways you can approach this.
If you want to do it all freehand, you’ll need to pay extra attention to drawing the correct proportions and alignments.
If you draw from life, you’ll have to use the age-old pencil and thumb method. If you are working from a photograph, however, you can make your life easier by using dividers to measure your subject accurately and drawing it to the same scale.
Then again, you can use a grid as I just explained or trace it. What trace!? Listen up, lots of guys trace. Believe me.
You’ll find this interesting: Tracing Art: Is It Good or Bad? When Is Tracing Cheating?
Once your main blocks and outlines are sketched, you can begin. I start with the eyes because they are the focal point of the picture and where I’m most likely to go wrong.
If I get this far and the eyes are placed properly and not cross-eyed, I can safely continue. If I stuff it up at this stage, I can start again without having invested too much time.
Does that ever happen? Yes, sometimes. We all have off days.
Plan and Compose Your Art: Final Thoughts
There’s more to creating art than inspiration alone. It takes planning to turn your initial idea into a presentable work of art. It’s both frustrating and elating in equal measure.
It’s tempting to get stuck in while you’re all fired up with enthusiasm and in the mood. It’s not always a great idea. Some of my best work succeeded because they were carefully planned and considered before I committed myself.
Take my advice, and plan and compose your art in advance.
It’s not the impassioned stereotype of the tortured artist, is it? If only the public knew, best not to say anything. There’s no need to tell anyone that you did your best art in front of the telly!
If you like the way I draw and want to know what I use, This is my basic kit

Have ever dreamed of selling your art for a living but don’t know where to start? I can show you how to do it the practical way, Step-by-Step!

If You Want to Sell Your Art
Check this out!
Psst…it’s only $12.99!
If you found this guide helpful you might like to check out these articles too:
- What Kind of Art Sells Best? The Secrets Revealed
- 7 Types of Contour Drawing Explained: Quick and Easy
- 32 Drawing Mistakes and Bad Habits Artists Must Avoid
- How to Know When Your Drawing is Finished: Don’t Ruin it!
- What’s the Right Paper for Pencil Drawing? (How to Choose Wisely)
- How to Make Prints of Your Art if You Don’t Know What You’re Doing
- How to Trace a Drawing: 12 Ways to Get Results – Fast!
- How to Draw Water in Pencil: Ripples, Reflections, Splashes, and More
- How to Protect and Preserve Your Drawings and Avoid Disaster
- Best Easel For Drawing and Painting: How to Choose
If you need more help with drawing, then I urge you to check out
Dorian Iten on Proko. His course is reasonably priced and inspiring
Pin For Later


Hi, I’m Kevin Hayler
I’ve been selling my wildlife art and traveling the world for over 20 years, and if that sounds too good to be true, I’ve done it all without social media, art school, or galleries!
I can show you how to do it. You’ll find a wealth of info on my site, about selling art, drawing tips, lifestyle, reviews, travel, my portfolio, and more. Enjoy