
Kevin Hayler: Professional Wildlife artist, author, and traveler.
I’m often asked how I can draw so well. Did I go to art school? Is it in the family? When did you first realize you could draw? These are easy questions to answer, but can anyone learn to draw?
Draw what you see and not what you know. Draw shapes and proportions before you add detail. Draw shapes within shapes. Draw light to dark and continue this process until something recognizable emerges.
Most people, who learn to draw well, discover their talent at an early age and the rest simply give up, but why is that? It’s because early setbacks convince people that they can’t draw, and that stays with them.
In this article, I will run through the basics of drawing. It’s very easy and then I’ll share my own experiences learning how to draw as a child.
Let’s crack on.
Disclaimer: When you buy something via my affiliate links I earn from qualifying purchases and sometimes earn a commission, at no extra cost to you. I am an Amazon Associate among others. I only recommend trusted sites.
Where Do Beginners Start?
The web is supposed to make it easier to find information but in reality, it’s information overload, and not all of it is helpful. How are beginners to know where to start and what to do?
It will, to some extent, depend on your personality type and your preferred method of learning.
In my personal experience, most artists tend to learn visually and prefer to watch an experienced artist, in the process of drawing, to gain a better understanding of the different techniques and approaches involved.
Ideally, we would all have a mentor, or serve an apprenticeship and learn our trade from a master. That’s not the modern way, we have Youtube or online art classes instead. Yet I learned before online learning was a thing, and I managed to teach myself without going to college and getting any formal tuition.
I learned by trial and error, endless copying, and from a few books.
Let’s go through your choices:
- Instructional Art Books
- Youtube Drawing Tutorials
- Blog Posts
- Online Drawing Courses
- Art Classes
- Private Tuition
In the real world, nothing beats hours of practice. The more you put in, the more you get out. It’s a golden rule. If you do the same things over and over, and often enough, eventually something will click.
Read this if you are returning to art: How to Get Back into Drawing Again After a Long Break
But there’s a problem with self-imposed discipline and learning by yourself. How do you know if you are following the right path? You might be learning all the worst habits. Not only that, rote learning will kill your enthusiasm.
I’ll go over the drawing basics first and then move on to where you can get help when you get stuck.
The Advice I Give to Someone Learning to Draw
1. Break the Subject Down Into Simple Shapes
Break the subject down into the simplest shapes. Look for the easiest and most basic shapes first, and draw them in lightly.
Using these tangible shapes as your guide, your next step is to draw in the neighboring shapes, adjusting them constantly, until they are in proportion.
Adjust and re-adjust these preliminary blocks with a light sketchy touch. Leave the pencil marks, don’t rub them out. Among these rough guidelines lies the accurate one. The true lines become apparent as you refine the sketch.
Having blocked in, do the same again within the blocks. Break them down further and further.
You are not drawing the subject as much as drawing the shapes within the subject. Only as you progress and the shapes add up, does the subject emerge.


2. Draw the Proportions Before the Detail
You have endless scope for correcting errors as you map out your new drawing. At this early stage, there is no time commitment. If you make a stupid blunder it’s no big deal to start again.
It’s vital to lay out the drawing accurately. Don’t be tempted to add any detail until you are sure the proportions are correct.
A classic error I see amateurs make is to add details way too early. They crack on with a detailed drawing before they have mastered the placement of each feature. Then having spent so much time trying to create a realistic drawing, it becomes precious to change.
They don’t want to lose all that hard work and try desperately to draw save that early success. The student is afraid of correcting and losing the good bits, and it soon becomes a rescue mission as things go wrong. The result is a disjointed wonky drawing, not even centered on the page.
The detail is the icing on the cake and it comes last.
3. Learn to Shade. Blend, Don’t Just Smudge
I would urge beginners not to smudge their drawings for effect.
Smudging is crude. Blending, by contrast, implies a controlled finesse and it’s not something to hurry.
Unfortunately, there is an overwhelming temptation for many newbies to cut corners and ‘rub-in’ the shading. The result is a dog’s dinner of dirty smears.
It’s better to learn to shade properly with a range of graphite pencils. Start lighter and build up. Don’t start too dark.
I wrote these related posts:
- Prevent Your Drawings From Smudging: The Ultimate Guide
- 32 Drawing Mistakes and Bad Habits Artists Must Avoid
Even the most subtle gradations can be achieved with the right grade of pencil. I will use the side of the hardest 9H to blend the faintest tones you can imagine.
Get to know your tools. For the best results, choose one brand of quality pencils and stick to them. Don’t mix brands, the grading system is not universal.
Experiment with different papers. Try rough and smooth. Build up the dark tones using layers instead of jumping in with the darkest grades first.
Cross-hatch using the side of the ‘lead’, not the point. Work with the paper grain. Make the speckled effect a feature of your drawing technique.
It’s only once you know what’s possible that you can go on to manipulate your effects confidently by blending.
4. Practice by Drawing From Photos
After their initial attempts at drawing from imagination, most children try copying from books and comics. Why? Because it holds their interest. So why then, do we insist that students draw boring crap?
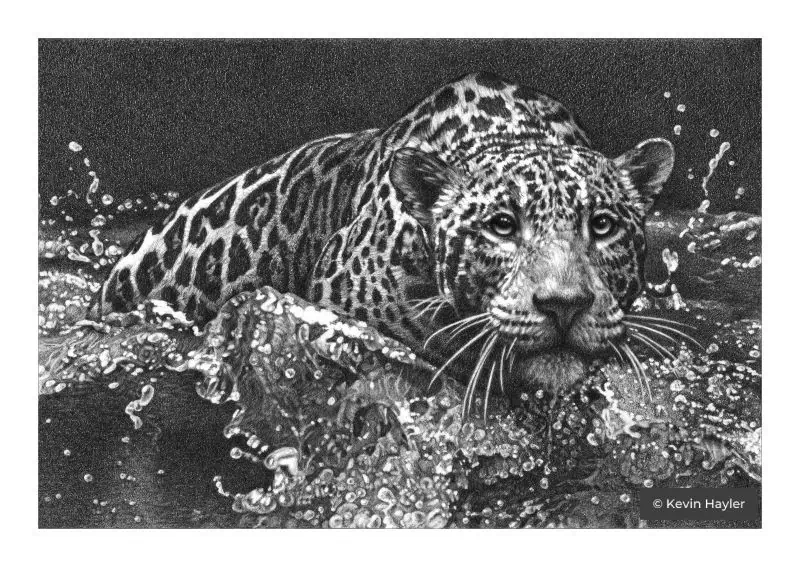
Why not draw something that interests you? I am fond of wildlife so that’s what I do. It doesn’t bore me, and I definitely need photographs.
It’s all very well thinking that you will take to the fields with a drawing pad and immerse yourself in the glories of mother nature, but I would advise against it at the beginning.
I think a beginner is better off taking some photos and working from them. I know the purists will have a hissy-fit but a learner has more chance of getting a good result from a photo, and that’s essential for motivation.
Read this if you’re not sure: Is Drawing From Reference Photos Bad? Are You Cheating?
A photo doesn’t move, the light doesn’t shift, and you can stop and start at will. It fits in with our busy lives. You can dedicate your head-space in concentrated 20-minute bursts and get results.
Think of a camera as just another drawing tool. It provides the artist with a reference image to be played around with as they see fit.

Learning to draw exclusively from photographs does, however, present some dangers. You can end up being a slave to the image. This is a constant problem for me. There is too much detail and it’s difficult to unsee it.
This will help: How to Plan and Compose Your Art: A Guide for Beginners
In true life, the brain distills the most important elements from the view, a camera, in contrast, captures everything. And a lens distorts perspective. A camera lens is not the same as a human eye. Amateurs don’t always recognize the difference and don’t compensate for it.
The easy way to recognize distortion is to find a vertical line and if it’s at a different angle you know the perspective is wonky. You may decide to keep them as they are, but at least you are making an informed decision.
It’s wise to practice freehand first by using the ‘blocking in’ method but you must accept that it will go wrong. It takes time and practice to ‘see’ properly.
A shorter learning curve uses the grid method with a photo.
I like to make a black and white photocopy of my photograph and enlarge it to the size I want to draw the picture.

Grid the copy. Try drawing either side of a ruler for accuracy. Do the same very, very lightly on your drawing paper. It must be accurate.
A learner will want to draw a very small grid but resist it. The idea is to learn to see the ‘shapes’.
Now instead of drawing the whole picture as we would from life, we draw each box. The same rules apply inside the box. We look for shapes and join them up.
Imagine each side of each square is divided by 10. A line will cross at some point along the scale. If it intersects halfway, it crosses at 5. Mark the point and gradually join up the dots.

So what happens if the shape is still too hard to discern?
Ideally, you should rough in the lines until you find the correct one but if that’s too frustrating you can draw a diagonal line from each corner of the square. Now you can draw the contents of each triangle.
As you gain the confidence you can make the grid bigger and bigger. At some point, your brain will click in and you’ll ‘see’ how to break up everything into simple shapes.
Another method is to use a compass or a pair of dividers to measure the distances between two points. That’s the reason to draw from the same size photocopy. It’s much easier.
All you need is a compass or a pair of dividers, and you can measure the distance between any two points, and mark them on your drawing paper. You can always find the third point by measuring the distance from the first two points and marking where they meet. And on and on you go.

5. Draw What You See and Not What You Know.
We’ll use eyes as an example. Everyone knows about the whites of your eyes, except they’re not white at all.
They are flesh-colored, pinkish, or even light blue. They are never white. A draftsman would draw the ‘whites’ as a light grey.
The only white is the sparkle in the eye.

OK, so this example is from my orangutan drawing. Don’t be picky. I want to show you another top tip. The iris is always lighter on the opposite side of the sparkle. That’s the key to a realistic eye. Remember that.
A tell-tale sign of an amateur is watching them drawing, or painting, without studying their subject matter properly. Proficient artists are constantly looking, verifying, and adjusting their work.
Their heads turn back and forth as if they’re watching a tennis match in slow motion.
A lot of time is spent studying the basic forms, visualizing different shapes, and analyzing negative space. An artist must concentrate and focus their attention fully.
Impatience will only result in mediocrity.
‘How to Draw’ Books
As a first step, I advise beginner artists to begin by buying a few good art books. It’s a cheap way to learn the basic principles of drawing, and let’s be honest, you can learn all the fundamentals from a book easily. And quite frankly, it’s mostly too boring, to sit through a class or a video.
You can read the text and copy the exercises and have the book in your library, ready to hand when you need it. It’s far more practical to leaf through a reference book than to fast-forward a video.
Learning from a good book will give you confidence. You can start from the comfort of your own home and at your own pace. There is no pressure to succeed and no fellow students to compare yourself to.
When I look back at my youth, I learned to draw by copying things from books. Naturally, I chose childish subjects and they changed as I grew and matured. I started with cartoons, progressed onto action comics, and then onto wildlife and drawing from life, as I entered my teens.
There is no better training than to sit down and copy things. Good reference images will help enormously. Keep it simple. Don’t jump in too deep, too early. You have no need to learn anatomy, you only need to know how to see simple shapes and proportions.
What’s more, working from a physical 2-D image will give you the added advantage of measuring points from the original image and drawing it to scale. It’s so much easier to draw something size for size.
Check these books out:
- Keys to Drawing
- Art Fundamentals
- The Sketch Encyclopedia
- Drawing on the Right Side of the Brain
- The Natural Way To Draw
Better to read my new post: Are Drawing Books Worth It? Can You Learn From Books?
Youtube Tutorials
Youtube is the 2nd biggest search engine after Google and it’s tempting to look for free lessons. We all do it.
Once you have found a good Youtube channel you can get to see a good artist in action. The problem is finding a good teacher with the right drawing skills, and with good presentation.
Don’t get sucked into thinking the number of subscribers and views equates to quality, that’s sadly not true. Youtube has its own ranking algorithm and talent doesn’t come into it. Many mediocre artists on Youtube have massive followings. Being young, quirky and fun is not the same as ability.
There are some great teachers on Youtube and most of the good ones are trying to make a living by giving away useful drawing lessons and encouraging viewers to buy a course. Fair enough, why not?
The freebies are worth having anyway, especially as they tend to give away stuff for beginners. You can learn most of the basics for free. Used in tandem with your drawing books and you are off to the races.
Make sure you watch demonstrations in real-time. These speed videos are for entertainment, you won’t learn anything. You need clear instructions and a complete list of art materials. You cannot expect to learn a drawing technique unless you use the same kit as the instructor.
Different types of pencils produce different effects, and that depends on the type of paper surface you work on. It’s only by using the same tools and equipment will you know if you are getting things right or wrong.
These Youtube channels are useful for beginners:
This is Stan Proko’s Drawing Course for Beginners

I follow these guys for Inspiration:
For more advanced tuition consider Stephen Bauman. He is classically trained and has a very academic approach to his art. This guy knows his stuff and is a very good tutor
Blog Posts
Don’t ignore blog posts, there are gems to be found. Not every drawing exercise or technique is covered by Youtube videos or needs to be. You can’t learn more about composition or perspective on a video.
Maybe I’m old school. I like to read things. I don’t like the waffle that accompanies so many videos. I don’t think I’m alone in that.
Blogs are very helpful when you get into a rut and lose your way. They are for finding fresh ideas and inspiration. Sometimes a good blog, written by a working artist, can reassure you when you’re struggling. It’s good to know that we all experience the same insecurities.
Even professional artists have self-doubt and imposter syndrome.
Similar to Youtube, Google can’t rank blogs on quality, it’s too subjective. You may have to scroll through to find the best sites. Another limitation that frustrates me as a content creator is the number of high-ranking art blogs solely aimed at very young children.
You could be forgiven for thinking adults don’t draw.
As a wildlife artist, I’m acutely aware that drawing animals is dominated by cartoon content and there is little incentive to write for adults knowing that I can’t compete.
When I surf the net and read blog posts I always look at the imagery. If the artist can draw, I will read the article. If not, it doesn’t matter what they say, I can’t take it seriously. Look on pages 2 and 3 before abandoning your search.
UPDATE: Google has rolled out a new algorithm in 2023 and the whole blogging world is spinning. Many sites, mine included, have seen their readership slashed to make way for Reddit, Quora, sponsered ads and Youtube.
The best art articles are seldom found at the top of searches now. Look on pages 2 and 3 before abandoning your search.
These are some of my posts I think you’ll find useful:
- How to Draw White Lines in a Pencil Drawing: Do This…
- How to Draw Texture in Pencil: 7 Tips for Realistic Results
- What Do Pencil Numbers Mean? Pencil Grades Explained + Charts
- 9 Ways to Stop Pencil Shine in a Drawing and Save Your Work!
- How to Draw Water in Pencil: Drawing Water Step by Step
Online Drawing Courses
Taking an online course will be the most practical option for most beginners. They are usually inexpensive, no more money than a good book, and teach you visually. It’s far easier to understand the drawing process when you can see someone explain what they are doing.
Some courses have good written text to accompany their videos, and most provide a coherent structure, with step-by-step lessons, that make the learning process easier.
The best online classes have excellent teachers who are able to practice what they preach and have a wealth of experience to pass on. What’s more, you have the chance to verify the quality of the course on offer before you buy.
If you need more help with drawing, then I urge you to check out
Dorian Iten on Proko. His course is reasonably priced and inspiring
You can research the tutor, see how well he, or she, can really draw, assess the course content on offer, and read the customer reviews. It will soon become apparent if there are issues of concern.
It’s also worth searching for the same teachers selling the same courses on different platforms, and for different prices.
It’s not surprising that the best teachers sell their profitable courses wherever they can, and knowing this you search for the best deal.
For instance, why join a site like Skillshare that requires a pricey subscription, and the loss of the course when it expires, when the same course is available to buy outright and cheaply on Udemy?
Read this post for a comparison: Udemy vs Skillshare: How Do They Compare for Creatives?
For anyone wanting to learn how to draw in their own time and at their own pace, joining an online drawing course is the way to go. You can fit the classes around your life, and not the other way around.
There are disadvantages, not everyone has the self-discipline to make their own work schedule and keep to it. Some people need a more formal structure and public accountability to incentivize them into action. Only you know what type of person you are.
Another obvious downside is the lack of feedback.
Some courses have forums for students to compare their work and support each other, but that’s no substitute for having a fully engaged tutor. In truth, you can’t expect personal guidance from a pre-recorded course, especially if you have only paid about $20.
You must be prepared to pay more if you want or need more. Unfortunately, you don’t always get what you pay for. I’ve seen online courses being sold by top colleges for hundreds of dollars that I wouldn’t pay $20 for on Udemy.
The art world is so up its own backside, that you are paying a premium for the brand and not the talent of the teacher.
I’ve written more about online art courses here:
- Are Online Drawing Courses Worth it? I Chose 5 of The Best For You!
- Is Domestika Worth It? The Pros and Cons for Artists and Designers
- Is Udemy Worth it? Pros and Cons For Artists and Designers
- Is Skillshare Worth It? The Pros and Cons for Artists and Designers
- Are Proko Courses Worth It? A Review – Pros and Cons
Try Patreon
You are far better off finding an artist you admire and seeing if they have a Patreon channel and joining that. I paid $10/month to follow Stephen Bauman on Patreon and that bought me access to all his pre-recorded material. He offered more personal help if you joined a higher tier.
This is new: Is Patreon Worth it? What You Should Know in 2023
The great thing about this business model, for a paying student, is you only have to pay for what you need. It’s a one-month rolling contract and when you are done, you can cancel your subscription. Plus you can rejoin anytime you like.
I can’t see many drawbacks. When you find a good tutor, you can sign up for the cheapest deal, for one trial month, and upgrade if you think it offers value for money. You can’t really lose.
The only problem I can see, if it’s a problem at all, is the sense of loyalty that you build with the artist. I felt guilty canceling my subscription after 6 months.
Art Classes
The traditional way of learning a new skill is to take classes in real life. Most towns will offer adult education opportunities in one form or another, usually, but not exclusively, through a local college.
There are alternatives. I see classes advertised locally offering private workshops, and life classes. There are private coaches and weekend retreats, you name it, there are services for everyone, for every budget.
Courses are held outside of working hours, often in the evenings or weekends, and they are an excellent way for students to learn one-on-one with a teacher who can offer advice and answer questions.
These classes will suit art students who need the company of like-minded people, all trying their hand at something new together. It is as much social as it is education.
Art classes are supposed to be relaxing and fun, with none of the pressure of formal institutions.
The biggest hurdle students face is the quality of the teaching. How do you know how good the teacher is until you sign up?
If you pay for a single workshop, you can shrug your shoulders if it wasn’t as good as you hoped, but when you pay a lot of money for a regular class, you do expect good tuition. Sadly, it’s not always the case.
In my view, art classes come into their own when you are trying to learn a specific skill from a teacher who excels in that particular practice. The best tutors don’t just criticize. they make the art themselves and demonstrate how they do it.
You will learn much more from a teacher with a natural talent, who can explain it to you, than you ever will from someone who knows the theory, but can’t prove it.
You will need to join a class if you want to learn certain skills. How else can you learn figure drawing but within the setting of a formal lesson in a dedicated space or studio? If you want to learn to draw from life, you must have the space to do it and preferably with the easel provided.
Private Tuition
On the face of it, having private drawing lessons is no different from having private piano lessons, but personally, I don’t think many adults will benefit a great deal. I can see the advantages of teaching a talented child to advance quickly, but as an adult, I’m not convinced.
I can’t help but think an adult, who has the money to hire a private tutor, expects to be able to pay extra, and get better results. I doubt if that is likely to happen, not sufficient to warrant the added premium. An intimate class with a few other students will be equally as good.
Check this out: How to Scale Up a Drawing in 4 Easy Ways

Frequently Asked Questions I’m Often Asked
At What Age Did You Learn to Draw?
I was seven. I know that because my first conscious memory of being complimented for drawing was when I moved to a new school.
I distinctly remember my new classmates gathering around to watch me draw an airplane.
Everyone else drew an aircraft body with one wing stuck vertically on top of the carriage and one stuck vertically below. I, on the other hand, drew a foreshortened wing as a parabola. I’d already discovered some basic ideas about perspective.
From there on my identity was ‘the kid who can draw’.
It’s easy to look back and apply some pseudo-psychology but I’m convinced that having a reputation to live up to, developed my talent.
All kids want to be accepted and to ‘fit in’, and we all cherish praise. That was my way of being liked and admired. What better incentive is there for getting better at anything?
I believe that practice at that early stage of life made all the difference. As my young brain grew so did my talent. I became good because I was constantly drawing and trying to get better.
Did You Inherit Your Ability to Draw or Learn it?
Anecdotally, my father was very good at drawing but if that was true, I never saw any evidence.
I wasn’t brought up in an arty culture at all. My family was thoroughly working class. My Dad was a bricklayer and my Mum worked in a fish and chip shop! There are no obvious influences or inheritances that I can point to with any conviction.
I can’t identify any link to nature or nurture. Maybe I’m a genetic throw-up or put another way, a freak of nature.
All I know is I grew up loving animals and I learned to draw them, it’s as simple as that.
Did You Learn To Draw At Art School?
No, I’m self-taught and decided not to go. I’ll never know if it was the right decision or not. It would’ve been good socially, but artistically? I have my doubts.
I meet so many embittered graduates that got nothing out of their education or were steered in a direction they had no wish to go. Formal art instruction was rare then and it’s almost gone now.
Personally, I think there’s more value to be had learning in an evening class and on Youtube than having an art degree.
Think about it. A young 18-year-old borrows a huge amount of money to have their skills rubbished by patronizing art snobs who can teach them how to think pretentiously but can’t teach them how to draw. That’s not my idea of value for money.
This post goes further: Is Art School Worth it? Is it a Waste of Money?
I think it’s important to learn from someone who is better than you and able to demonstrate a technique. I was better than my art teacher by the time I was 15 and he couldn’t teach me by example, he could only critique. That wasn’t good enough for me.
Wouldn’t it be great to have had a mentor or be apprenticed to a master? It would have cut years off my learning curve.
The Best Way to Learn Drawing: Final Thoughts
Can anyone learn how to draw? Yes. The theory is easy. Can anyone learn to draw well? No. Just as everyone can play a sport, only a few are really good at it. You can progress and get become a better artist. Your aim is to maximize your potential and enjoy the process
Creating a good drawing is not an impossible task, it’s relatively easy after a while, but excellence is very hard work. Your temperament will play a part.
There is more to drawing than tuition. There are other limiting factors at play. You might be able to draw but have you got the personality to pursue it? Will you take the time and have you got the patience?
It’s a cliche but I have to finish this post by pointing it out again. If you want to make great drawings and develop a unique personal style…
Nothing beats practice.

If you like the way I draw and want to know what I use, This is my basic kit

Wanna take your drawings to the next level and sell them? Read this guide and discover how to do it, step-by-step.

If You Want to Sell Your Art
Check this out!
Psst…it’s only $12.99!
These posts may also interest you too:
- How Do Artists Get Their Ideas? (It Might Surprise You)
- How to Find Your Own Art Style. It’s Easier Than You Think
- The Basic Skills of Drawing: Learn to Draw For Beginners
- Can You Copy Art and Sell a Painting of a Painting? I Found Out
- Is it Cheating to Trace your Art? Is it Really OK?
- How to Draw Realistically: 11 Realistic Drawing Tips
- How to Create Depth in Your Drawing and See it Improve
- How to Draw a Giraffe Realistically: An Easy Guide
Pin For Later


Hi, I’m Kevin Hayler
I’ve been selling my wildlife art and traveling the world for over 20 years, and if that sounds too good to be true, I’ve done it all without social media, art school, or galleries!
I can show you how to do it. You’ll find a wealth of info on my site, about selling art, drawing tips, lifestyle, reviews, travel, my portfolio, and more. Enjoy