Kevin Hayler: Professional Wildlife artist, author, and traveler.
This post will teach you how to use layers in Procreate, the drawing app for Apple iPad. It is a no-nonsense, step-by-step tutorial.
I cover all aspects of using layers:
By the end of this post, you’ll understand everything you need to know about layers in the Procreate app.
Let’s get started!
Disclaimer: When you buy something via my affiliate links I earn from qualifying purchases and sometimes earn a commission, at no extra cost to you. I am an Amazon Associate among others. I only recommend trusted sites.
1. How to Create a New Layer in Procreate
This is where it all starts. As a beginner, I’ll assume you have little knowledge of Procreate layers and this is all new to you.
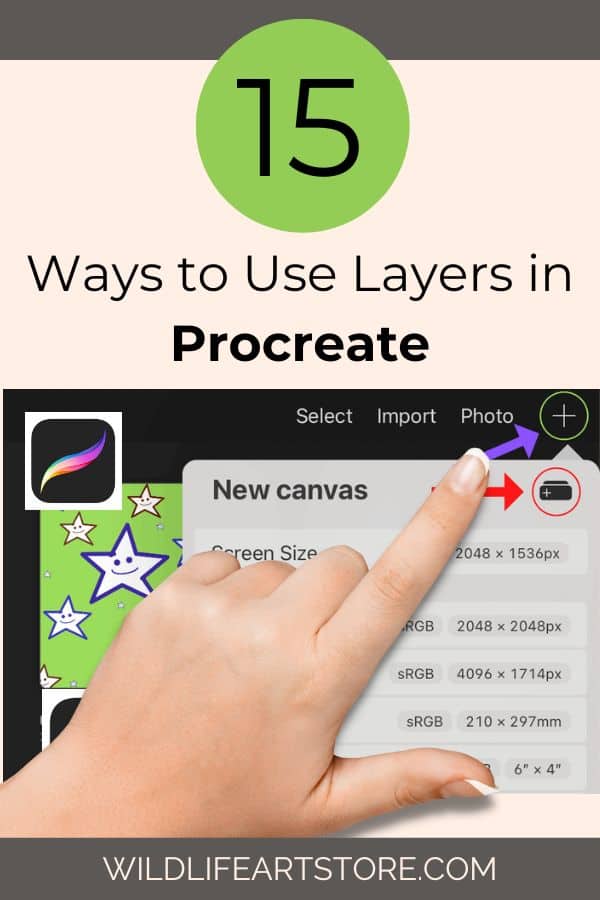
The very first thing we will do is open a new Canvas. This is how you do it:
- Firstly, open your Procreate to the Gallery page
- Tap the plus “+” sign at the top right of your screen
- Tap your choice and it opens in the editor as a new blank canvas.
- Choose a preset or tap the black folder icon at the top right. That’s the one with another plus sign. Tap it to open the Custom Canvas page
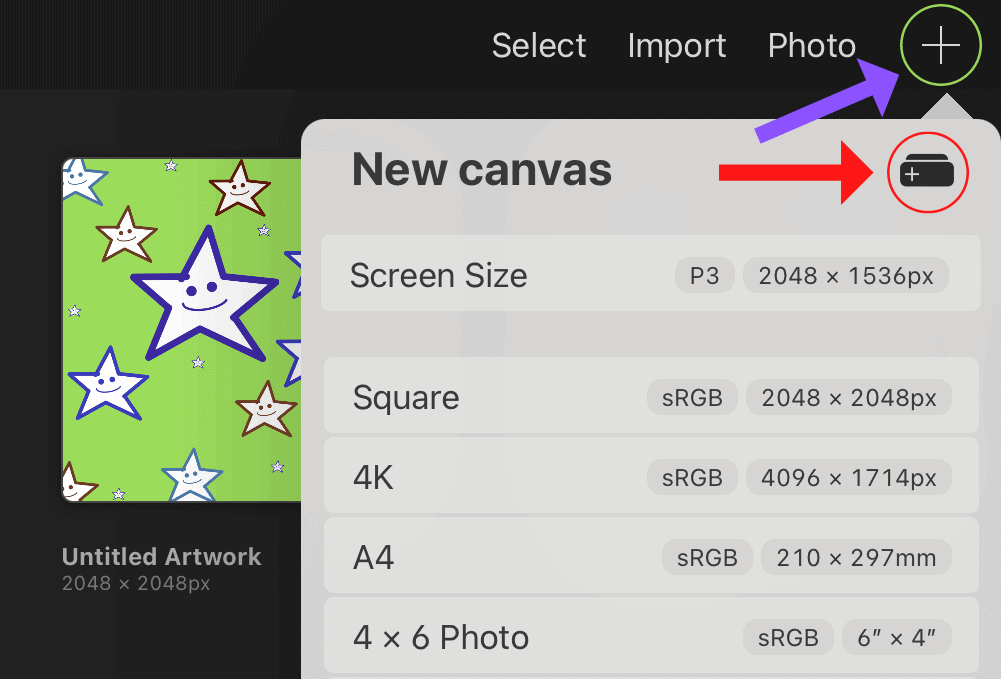
- Enter your preferred canvas size in the “Width” and “Height” bars. Note that the maximum layers will be calculated and displayed beneath.
- Enter 72DPI for the internet and 300DPI if you intend to print your file.
- Tap the “Create” button to open the new canvas
- Your new blank canvas will open in the app with the first default layer already opened.
You are ready to start drawing.
How to Add a Layer
When you are ready to make another layer do this:
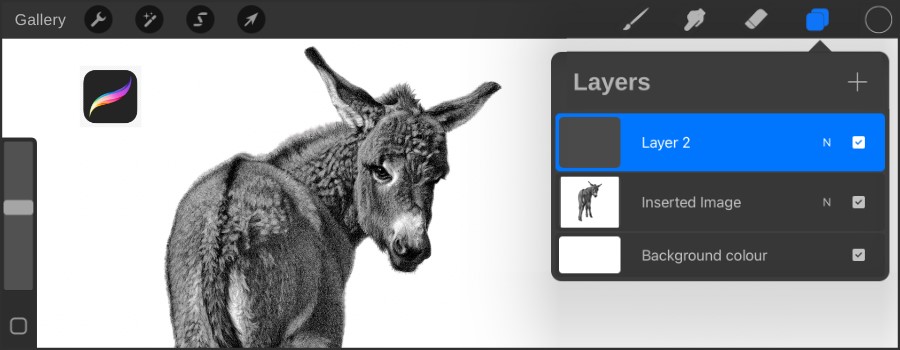
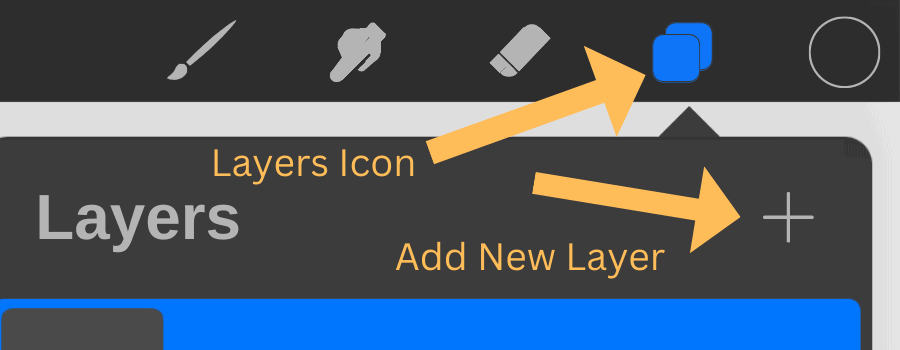
- Tap the layer icon at the top right of your screen to open the layers panel
- Tap the plus icon (+) to add a new layer
- It will appear above the active blue layer
2. How to Move a Layer in Procreate
Think of layers as a pack of transparent cards stacked on top of each other. The visible cards are at the top and progressively hidden toward the bottom.
Sometimes it makes sense to rearrange the order. It’s simple.
This is how you move a layer in Procreate:
- Click the Layers Icon at the top right corner of your Procreate editor. It’s the two blue boxes.
- Your layers panel opens with the active primary layer highlighted in blue.
- Tap on any layer you wish to move. Tapping it will activate the layer
- Keep your finger or Apple pencil pressed down and slide the layer up or down.
- When you release your finger the layer will move to its new position
Note that you can only draw on an open layer.
3. How to Move Multiple Layers in Procreate
(Just to be clear, the blue layer is active and will move with your selection)
This is how you move multiple layers:
- Open the layer panel
- Swipe selected layers to be moved to the right. They will turn dark blue
- Hold your finger down on any selected layer and move your finger
- Your selection concertinas into a single bar
- Still holding your finger slide the group up or down
- Lift your finger and your selected layers will unfold in their new position
- Tap a layer to deselect them all
4. How to Organize Your Layers Into Groups
It’s easy to end up with a large number of layers and it gets confusing. You can organize group layers to make life easier.
This is the same initial process as moving multiple layers:
- Tap the Layers icon and open your layers panel
- Choose the layers you wish to group together
- Swipe the layers to the right and they’ll turn dark blue
- At the top right tap “Groups”
- A new title box appears called ”New Group”
- Tap “New Group” to activate it (Turns blue)
- Tap again to open the side panel
- Tap “Rename” and choose an appropriate title
You can move the new group by holding down the title box and sliding it up or down. The group selection will concertina as you do so and unfold when you release your finger.
You can move individual layers in and out of your group by activating the layer (turns blue), holding it down with your finger, and sliding it into or out of the group.
Groups are folders by another name, and you can hide the tiles when you don’t need them.
To close the folder look to the right of the group title box and click on the downward arrow “V”
This will shrink the group into one tidy box “>”
5. How to Find a Layer in Procreate
If you want to make a correction and can’t find the right layer, here’s an easy way to find it:
- Tap the wrench icon to open the “Actions” tab
- Tap “Prefs” to open the menu
- Tap “Gesture Controls” to open that menu
- Tap “Select Layer”
- In the “Customise Layer Select” menu , toggle “Touch”
- Tap “Done”
Return to your image and when you touch the screen a tab tells you what layer you are on and selects it automatically.
6. How to Move a Layer to Another Canvas
You can select a layer and move it to another canvas if you wish.
There is more than one way. You can drag and drop a separate layer or cut and paste.
This is how to drag and drop a layer onto another canvas
- Tap the layers icon
- Choose a layer and hold down your finger
- Slide your layer to the canvas but don’t let go. Your layer will follow your finger.
- Tap the “Gallery” tab on the far right with your other hand.
- The Gallery will open
- Lift your finger and your layer appears on a new canvas
- Alternatively, select a canvas (or create a new one)
- It will open in your editor
- Release your finger and the layer will drop onto your new canvas as a selection.
7. How to Copy and Paste a Layer to Another Canvas
There are 3 different ways you can go about this:
1. How to Copy and Paste with a 3-Finger Swipe
- Tap and open the desired layer
- Use three fingers to make a short swipe downward, anywhere on the screen
- In the popup “Copy and Paste” menu choose “Copy”
- Tap the “Gallery” link at the top left of your screen
- Tap and open a new canvas
- Swipe 3 fingers again to open the popup
- Select “Paste”
- The layer will appear as a selection
N.B. You can “Cut and Paste” in the same way
2. How to Copy and Paste From the Layers Menu
- Tap the layers icon and open the Layers panel
- Tap to activate the layer (turns blue)
- Tapping the blue layer opens a side menu
- Tap “Copy”
- Tap “Gallery” and open a new canvas
- Tap the “Wrench” icon to open the “Actions” box
- Tap the “Add” icon on the left (2 blue squares with a plus (+) sign)
- Tap “Paste”
3. How to Copy and Paste From the Actions Menu
- Tap on a layer from the layers panel
- Tap the “Wrench” icon to open the “Actions” menu
- Tap “Copy” or “Copy Canvas”
- Tap the “Gallery” link
- Open a new canvas or select an existing one
- Tap the “Wrench” and open “Actions” again
- Tap “Add”
- Tap “Paste” to add the layer as a selection
Again, the option exists to “Cut and Paste” the layer if you should wish to do so.
Learn to duplicate in every way: How to Duplicate in Procreate: Copy and Paste, Cut, and Clone
8. How to Delete a Layer in Procreate
If you need to delete a layer it’s easy enough.
Delete a layer like this:
- Swipe a layer to your left and it opens 3 tabs, “Lock”, “Duplicate”, and “Delete”
- “Delete” will be highlighted in red by default.
- Tap the “Delete” button
N.B. If you make a mistake and wish to rescue your layer, tap two fingers on the screen to undo your last command
Read this post and learn How to Undo in Procreate: Plus Redo Gestures (2023)
9. How to Duplicate a Layer in Procreate
This is the same sequence as before:
- Swipe a layer to the left
- Tap “Duplicate”
- An identical duplicate layer is created above
10. How to “Lock” a Layer
Repeat the same actions as above and tap “Lock”
- Swipe a layer to the left
- Tap “Lock”
- A locked Padlock icon appears
Locking a layer prevents any alteration of that single layer.
Why struggle? Just grab a course and follow along. This is the most popular Procreate course on Udemy
11. How to Merge Two Layers in Procreate
You can merge two adjacent layers together. This is how it’s done:
- Open the layers panel and select two layers to be merged
- They must be stacked together
- Tap the upper layer to turn it blue
- Tap it again to open the side menu
- Tap “Merge Down” from the menu
- The two layers will merge into one
You can also use your finger and thumb to pinch the two layers together but it’s fiddly and irritating.
12. How to Merge Multiple Layers
To merge more than one layer you must make a group folder as I explained earlier.
- Select 3 or more layers and swipe each of them to the right
- Tap “Group”
- Tap the “New Group” title layer to open the side menu
- Tap “Flatten”
This will merge all those layers within the group into one.
Tip: When signing up for Udemy for the first time they will give you a huge discount
13. How to Use the “Clipping Mask” on Layers
Here’s how to add texture or elements to a transparent shape without going over the edges:
- Make a shape or shapes on a layer. Everything on the single layer will be active
- Open the Layers panel and click the plus “+” sign to create a new layer
- Tap on the new layer and open the side menu
- Tap “Clipping Mask”
- The new layer is now clipped to the layer below An arrow icon appears on the left side of the new layer box
- Now they are joined together, everything you draw/paint on the new layer will appear within the shapes of the layer below, without crossing the edges
- You can erase, move or delete your top layer without losing the shapes in the layer below.
This option allows you to work in a non-destructive way. Your base layer remains intact.
14. How to Use the “Alpha Lock” on Layers
Alpha-lock is very similar to the clipping mask but this time there is one layer only.
- Open a canvas and make a shape or shapes. Only shapes on this layer will be affected
- Tap the layer and open the side menu
- Tap “Alpha Lock” The active layer will have a checkered background
- Any line or pattern you make will appear only within the shape’s boundaries
15. How to Change the Layer Opacity in Procreate
It’s easy to adjust the transparency of different layers. This is what you do:
- Tap the layer you want to adjust (turns blue)
- Tap the “N” on the right-hand side
- Adjust the opacity slider at the top of the dropdown menu
There’s another way.
- Choose your layer
- With two fingers, tap the layer box
- The opacity slider is shown as a blue line at the top of the screen
- Slide your finger or stylus across the screen from right to left and the opacity slider activates.
- Go back and forth until you’re happy
This post covers opacity in full: How to Change Layer Opacity in Procreate: Step-by-Step
How to Use Layers in Procreate: Final Thoughts
Understanding how layers work is essential if you want to use Procreate effectively. It’s a powerful tool and many professional artists and designers prefer it to Adobe Photoshop.
It’s easy to why Procreate is so popular. You can get started as soon as you open the app. That’s the great thing, it’s a relatively short learning curve, especially if you compare it to Photoshop.
If you follow the simple instructions in this tutorial you will have the basics of Procreate and the knowledge required to take your digital art to the next level.
Now check out the posts below.
You’ll find these related posts useful:
- Is The Procreate App Worth it For Beginners? Get the Facts
- Is it Worth Buying an iPad for Procreate?
- How to Add a Grid in Procreate and Improve Your Drawings
- How to Make Straight Lines in Procreate: Step-by-Step
- How to Make a Stamp Brush in Procreate: Step by Step
- How to Use the Symmetry Tools in Procreate: Step-by-Step
- Do You Need an Apple Pencil for Procreate? I Found Out
- Does Procreate Work on iPad Mini 5? What You Need to Know
- How to Duplicate in Procreate: Copy and Paste, Cut and Clone
- How to Print From Procreate: Your Step-by-Step Guide
If you want to learn the fundamentals of Procreate by following simple, easy-to-understand, visual instructions, you will benefit from the same course I took.
Brad covers the basics of digital illustration in his Domestika course.
It’s super affordable and with no hidden fees!
Never heard of Domestika? Check out my review: Is Domestika Worth It? The Pros and Cons
If you want to sell your digital art as physical art prints, I can show you how!
These are business-related posts:
- What Kind of Art Sells Best? All The Secrets Revealed
- Is Print on Demand Worth it? The Pros and Cons for Creatives
- Are Online Drawing Courses Worth it? I Chose 5 of The Best For You!
- Can You Copy Art and Sell a Painting of a Painting? I Found Out
- Is Selling on Etsy Worth it? Pros and Cons for Artists and Crafters
- 25 Platforms for Artists to Sell Their Art Online and Make Money
- 19 Ways to Make Money as an Artist Online and Off: No Fluff!
- Drawing Ideas for Adults: 120 Cool and Easy Things to Draw
- Is Redbubble Worth it? Pros and Cons For Artists and Designers
Pin it and Save it

Hi, I’m Kevin Hayler
I’ve been selling my wildlife art and traveling the world for over 20 years, and if that sounds too good to be true, I’ve done it all without social media, art school, or galleries!
I can show you how to do it. You’ll find a wealth of info on my site, about selling art, drawing tips, lifestyle, reviews, travel, my portfolio, and more. Enjoy

